Teaching a workshop for their series about maker communities and having the students create simple experiential tools to explore plant physiology!
Bat Night Signal
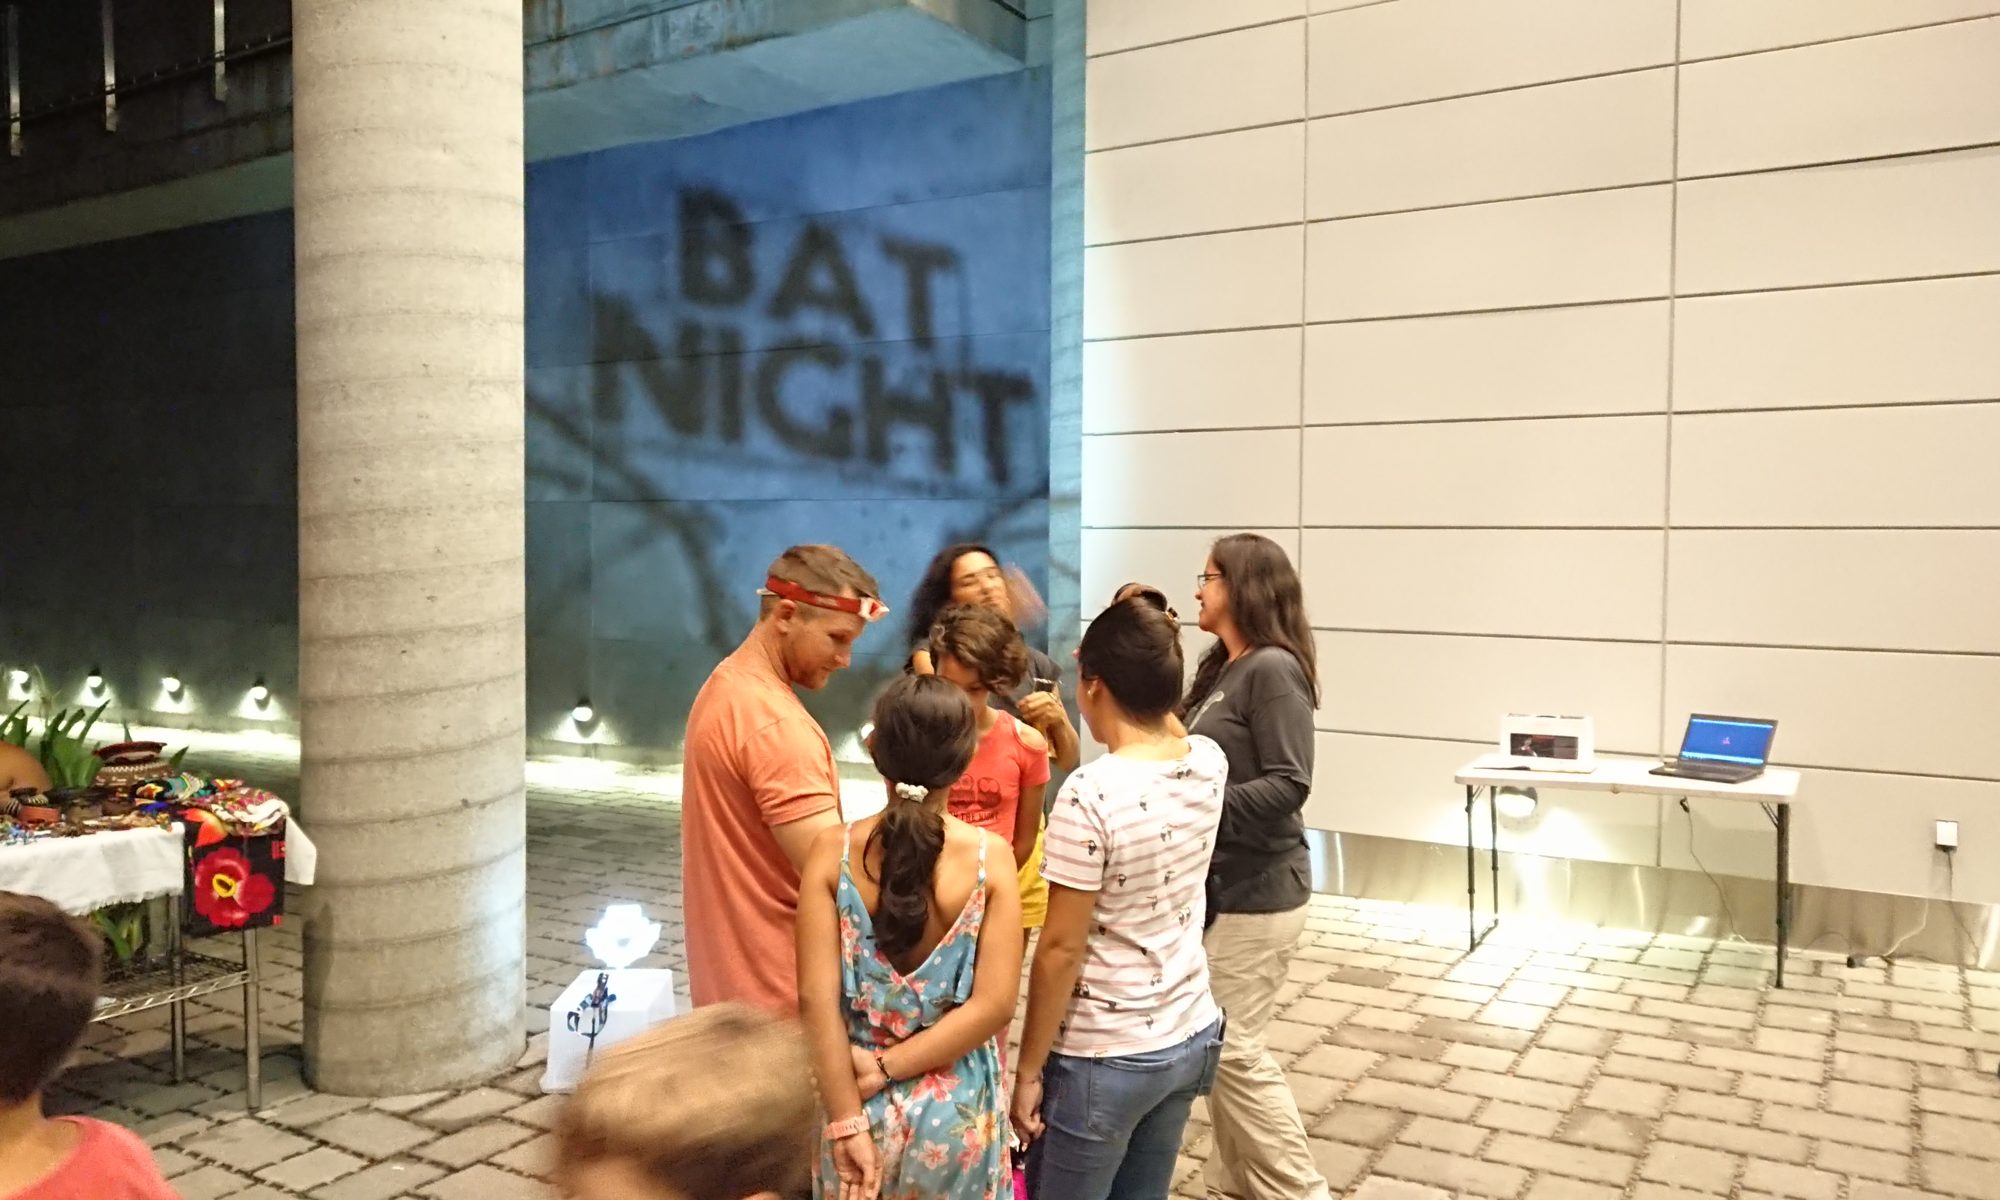
Rachel Page’s Bat Lab at the Smithsonian Tropical Research Institute has been hosting a monthly outreach “Bat Night” in gamboa Panama, for quite some time. DINALAB figured it was about time they had their own bat signal!
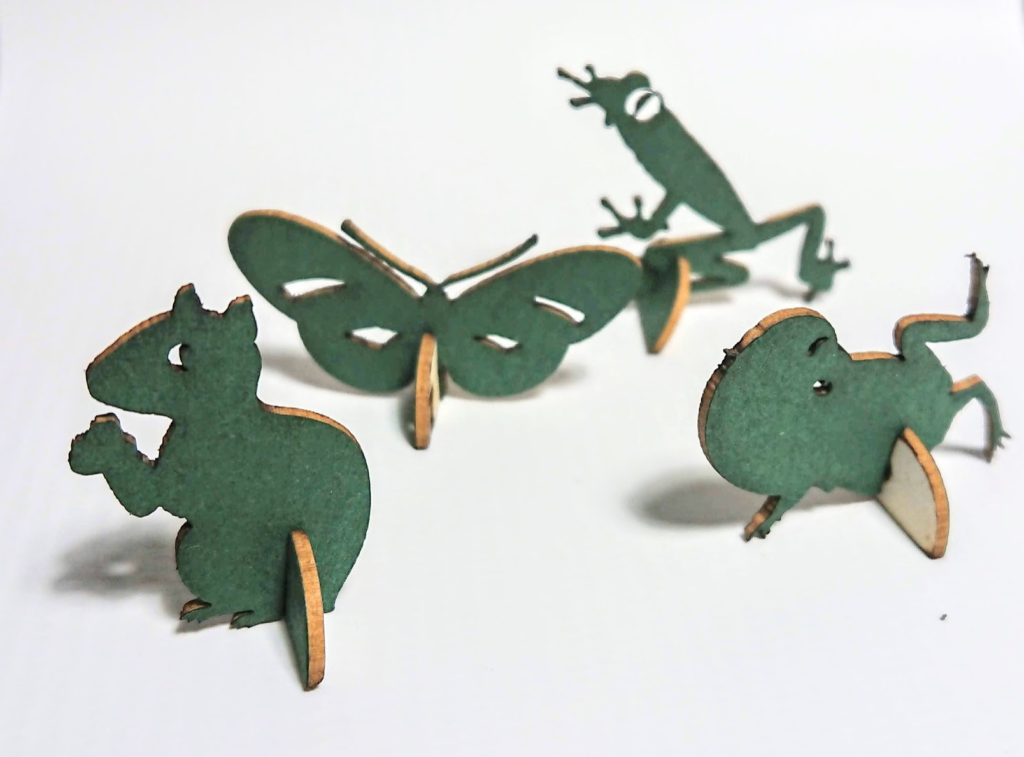
Gamboa Games
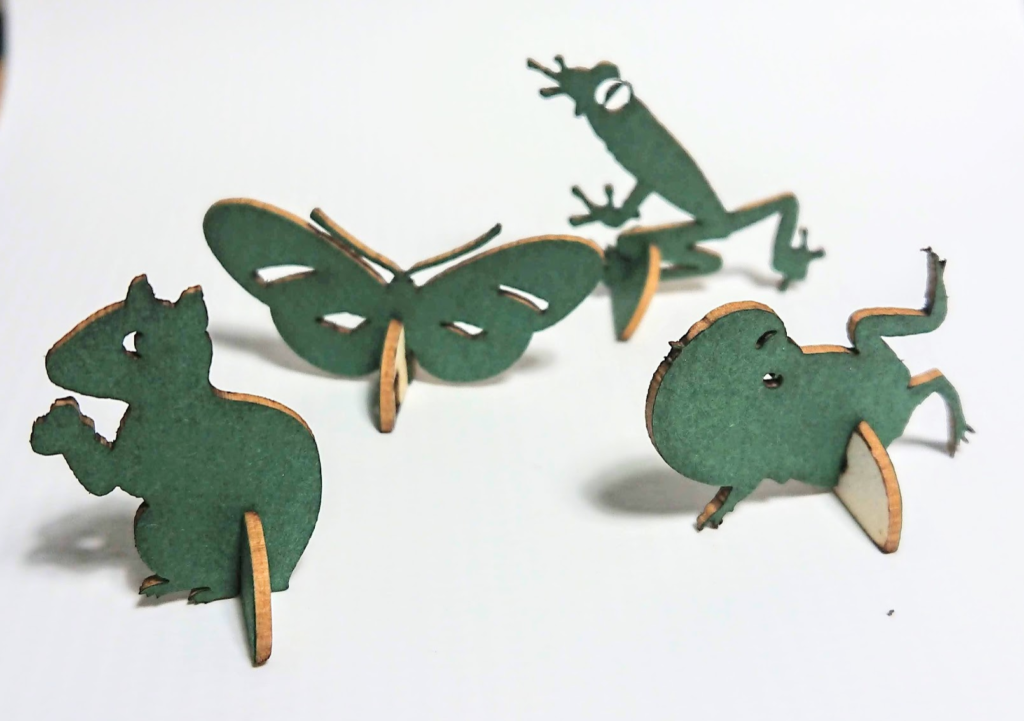
We are making a suite of open-source DIY board games. The goal is to find things that
- are fun to play
- can be sold to support the lab
- make use of the scrap material from science project prototyping
Open Hardware Fridays at DINALAB
October is Open Hardware Month, so we are extending our normal, weekly open-labs! Come build open-science hardware, share, and learn!
Stop by Digital Naturalism Laboratories, Casa 123B, Gamboa Panama, the first several fridays of october to join us in:
- Repairing Field Equipment
- Laser Cutting Workshops
- 3D Printing Workshops
- Arduino Workshops
- Jungle Bicycle Repair
- 360 Camera Trap Testing
- Jungle Yarncrafting
- Whatever you feel like doing
- and all kinds of Art-Science Design Fun!
Times:
Friday Oct 4 : 2-5 PM
Theme: Laser Cutting
Friday Oct 11: 10am-1PM
Theme: Bicycle Repair!
Friday Oct 18: 1-5PM
Theme: Arduinos and Sensors
*Thursday* Oct 24 – on BARRO COLORADO ISLAND – for open science hardware office hours
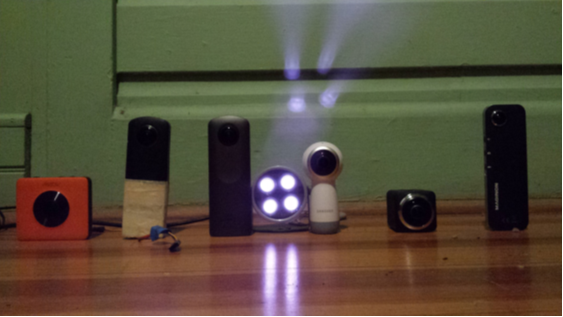
Panatrap: 360 Camera Comparisons (2019)
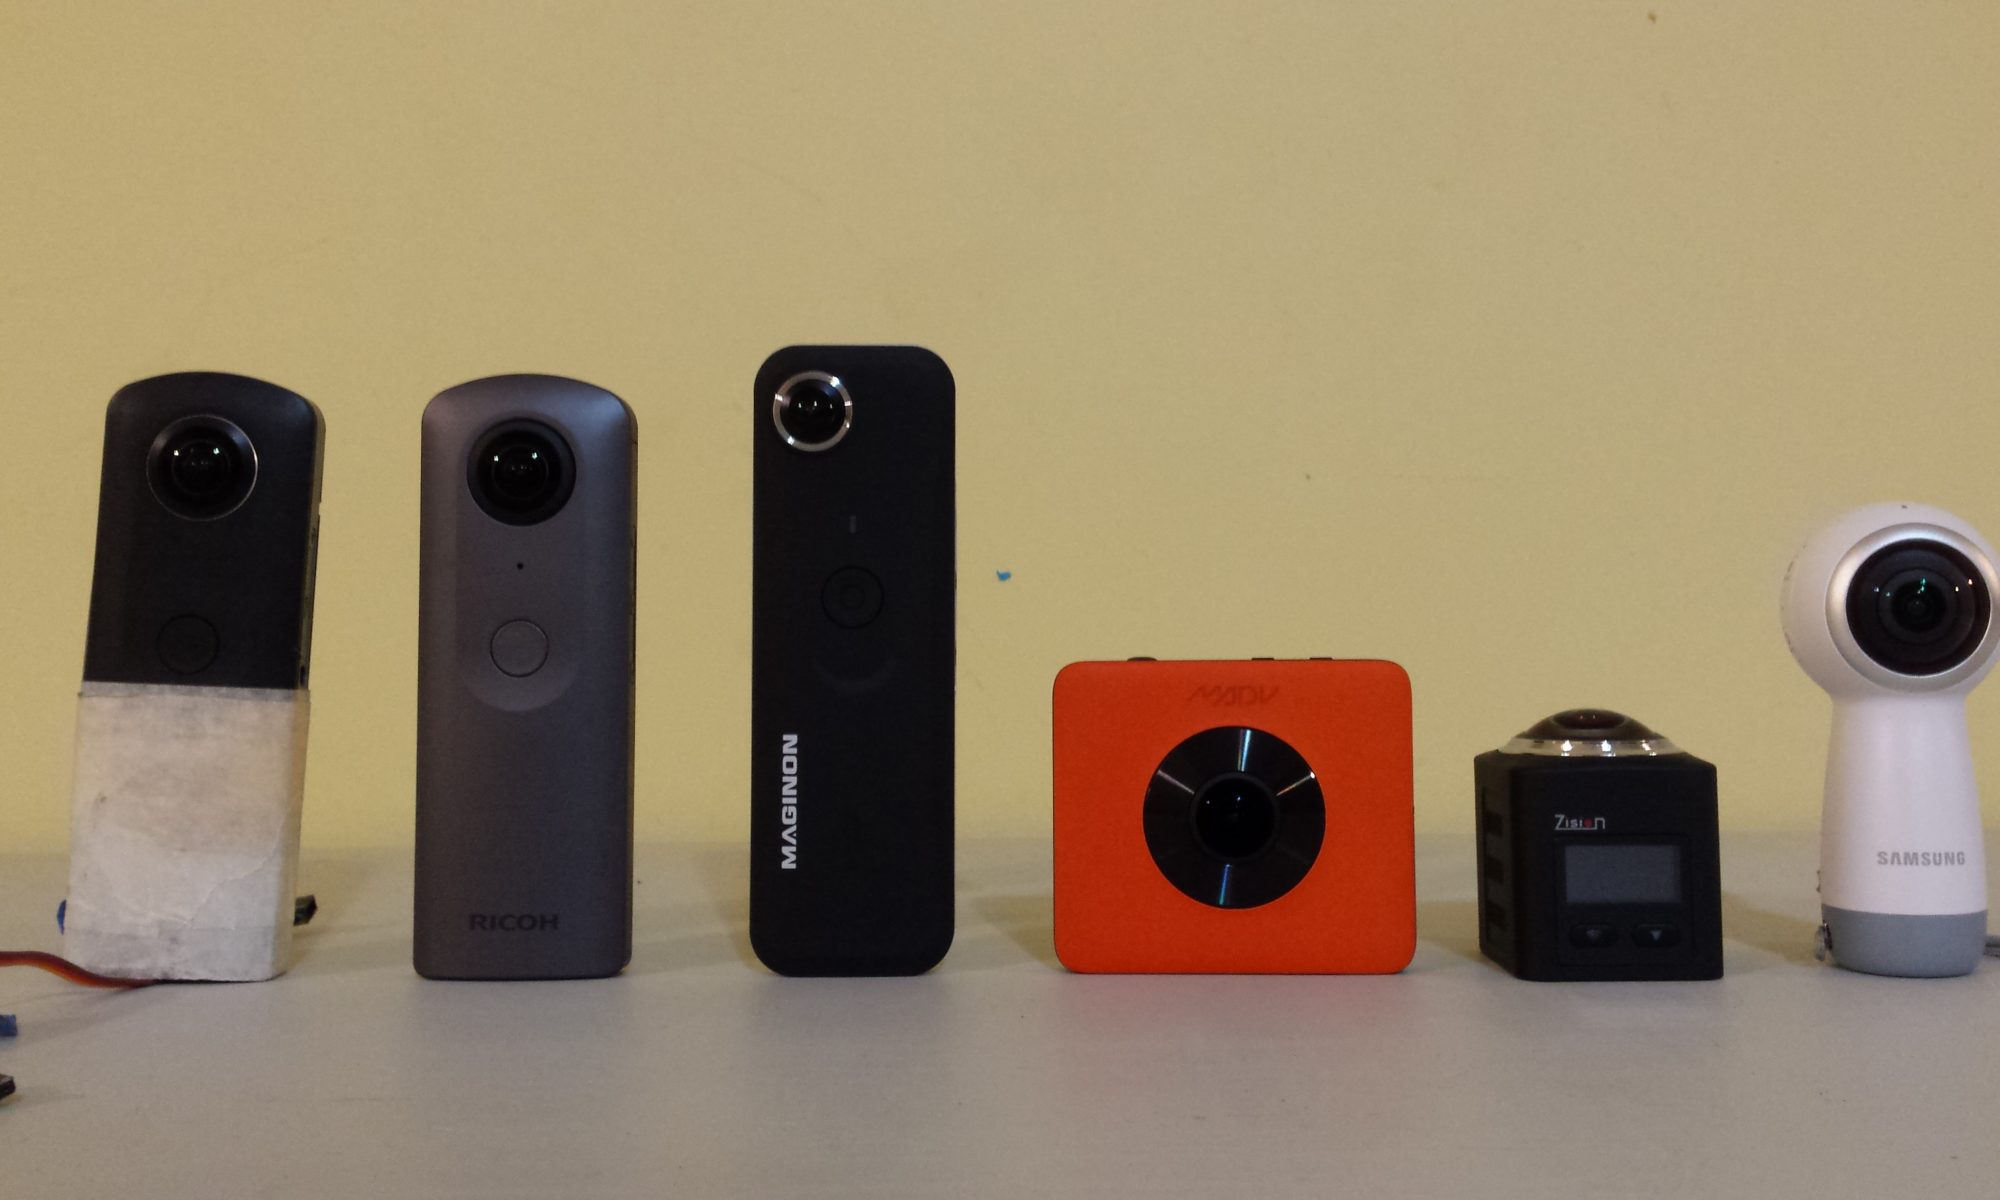
For our open-source 360 camera trap project, we wanted to evaluate the field and figure out what the most available and useful cameras to hack would be. We collected about 6 commercially available camera traps and evaluated them on their
- Hackability
- Image Quality
In our qualitative order, here is a ranking of those cameras we have tested and the order we want to hack them:
| Camera type | Object Pixel Density (front) | Object Pixel Density (side) | Distortion | Sensitivity to infrared | Price paid |
| MadV | 127*127 | 133*133 | None | Lowest | 300 |
| Ricoh Theta V | 100*100 | 100*100 | None | Highest | 430 |
| Samsung Gear | 95*95 | 143*133 | Some | Low | $83 |
| Ricoh Theta S | 100*100 | 100*100 | None | High | 270 |
| Zision | 166*166 | 90*110 | Most | Low | $60 |
| Maginon View | 50*50 | 45*50 | Some | Low | $55 |
Basic Testing Procedure
Object Pixel Density
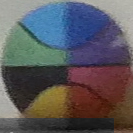
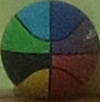
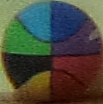
We took all of the cameras in a room with controlled lighting, and placed a colorful, standard-sized basketball exactly 2 meters away from each camera.
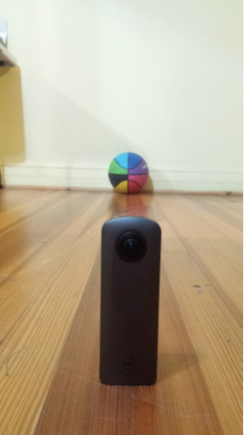
Two pictures were taken in two camera positions, one with a lens straight in front of the subject, one with the camera sideways (or upwards for the Zision). The object is positioned at 2 meter.
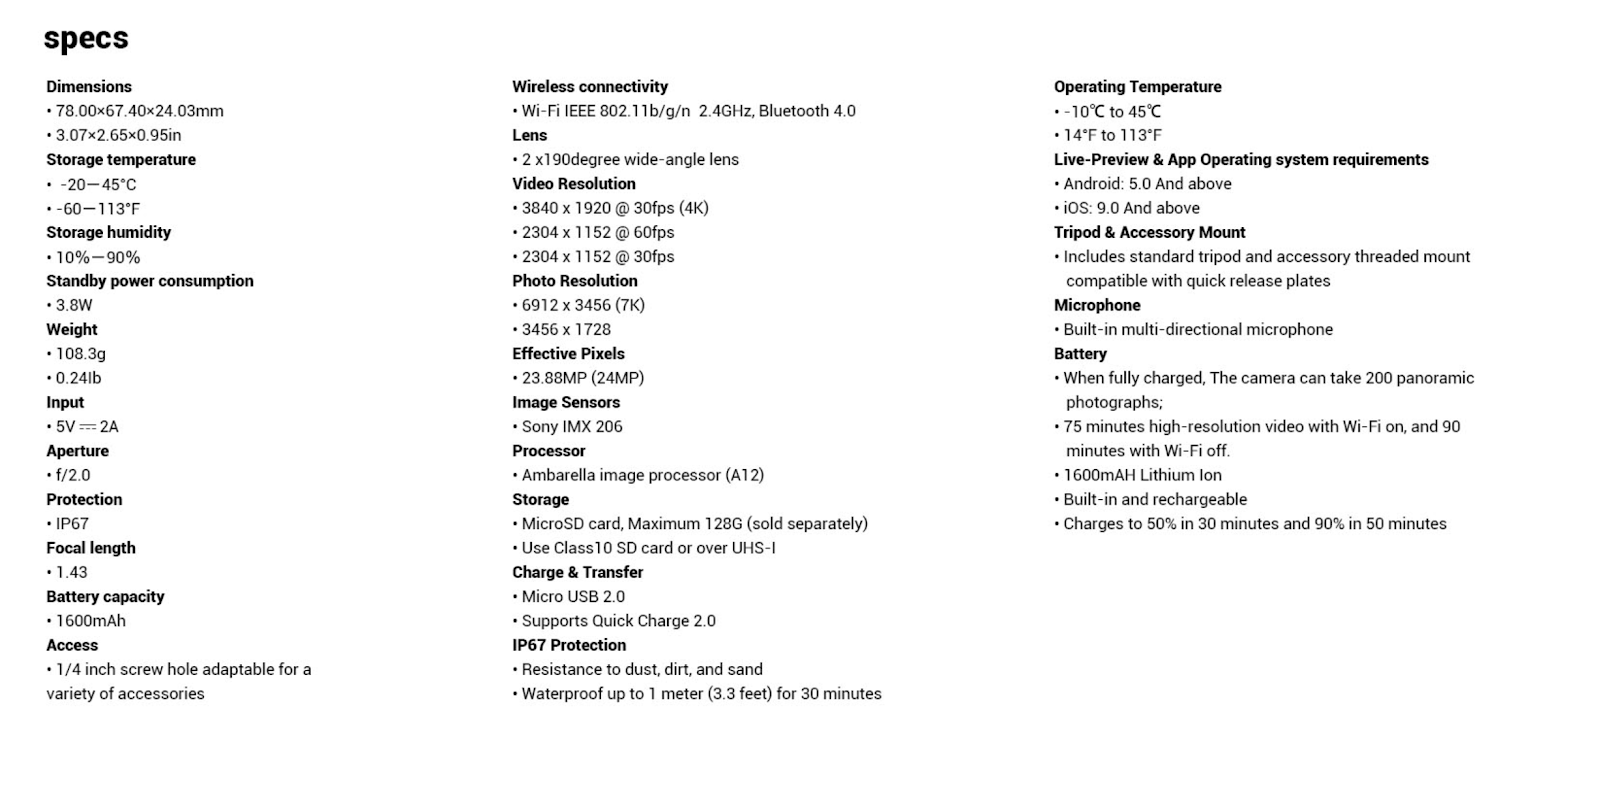
IR Sensitivity
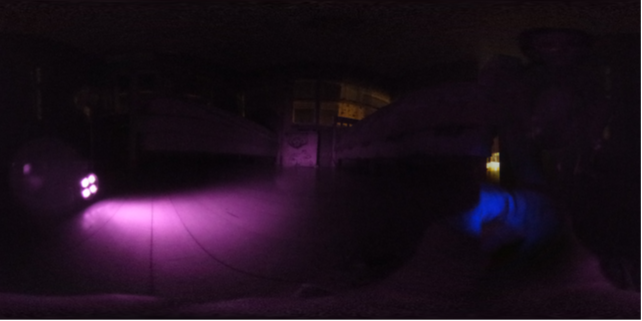
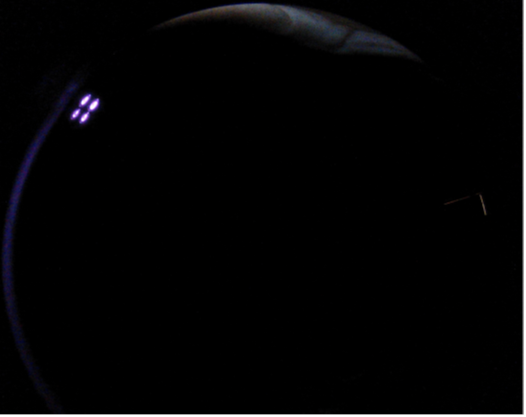
To test the cameras’ sensitivity to infrared light. We placed the same calibration object (the colorful basketball) at a distance of 2 meters, with the camera positioned between the subject and the light.
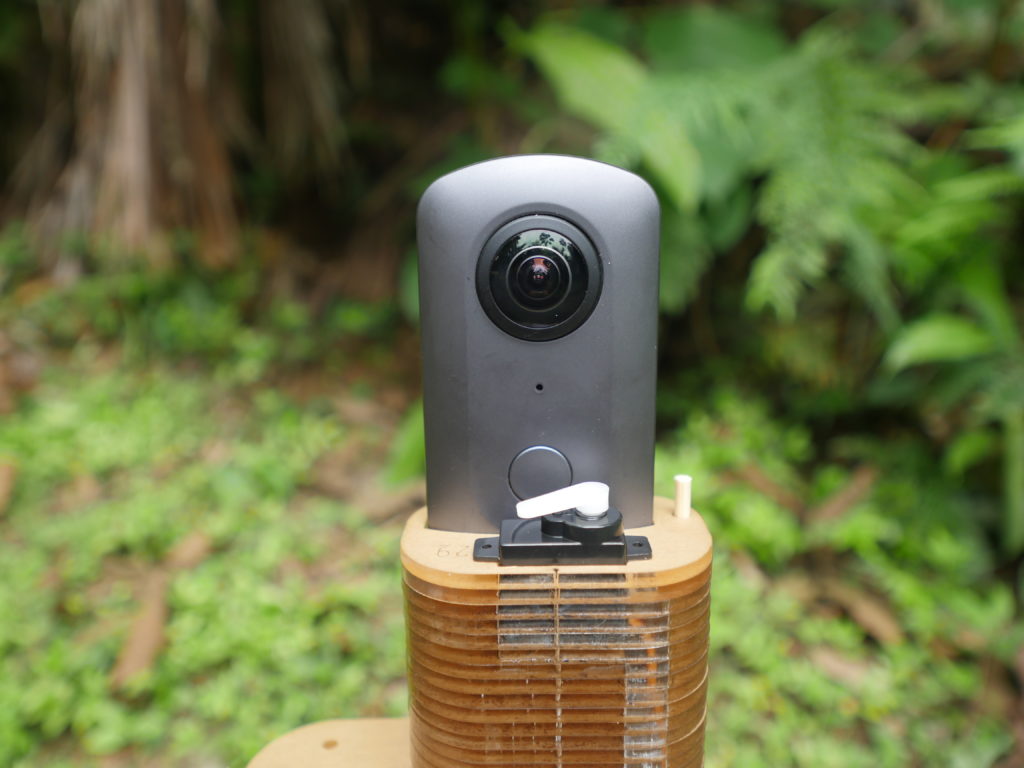
Xiaomi MADV (Mijia Sphere)
General Camera Details
Price
$349 ($299 on sale)
Object Pixel Density + IR Sensitivity
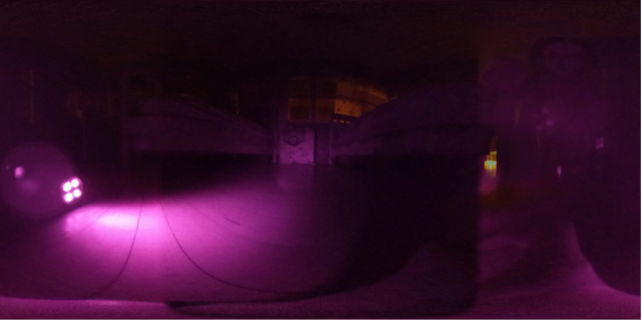
The MadV has a resolution of 127*127 px when ball is in front of the camera and 133*133 px from side view. Its sensibility to infrared light is quite poor. With the target at a distance of 2 meter, it was not able to show anything.
Picture with infrared light
Front
Side
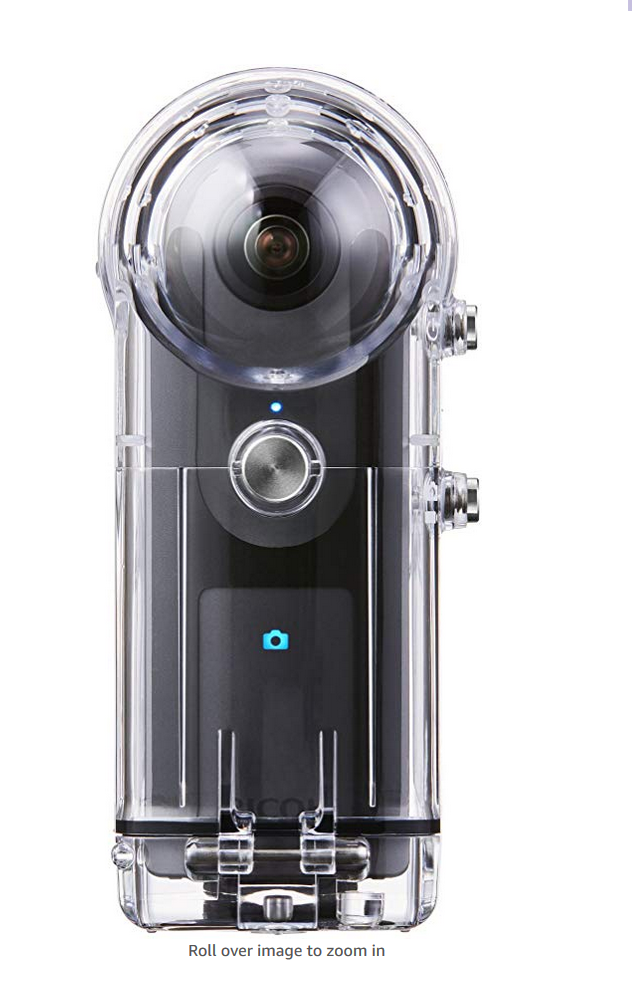
Ricoh Theta V
| Video Stitching Resolution | 4K |
| Internal/External Stitching | Internal Stitching |
| 360 Stitched Video Format | Internal:3840 x 1920 at 29.97 fps (56 Mb/s MP4 via H.264) 1920 x 960 at 29.97 fps (16 Mb/s MP4 via H.264) |
| Still Image Resolution | JPEG: 14 Megapixel, 5376 x 2688 (2:1) |
| Number of Lenses | 2 |
Camera per Lens
| Sensor | 1-Chip 1/2.3″ CMOS |
Optics per Lens
| Maximum Aperture | f/2 |
| Lens Elements | 7 |
| Minimum Focusing Distance | 4.0″ / 10.2 cm |
Recording
| Recording Media | x Internal Flash Memory |
| Built-In Mic | Yes |
| Channels | 4.0-Channel Surround |
| Audio Format | AAC-LC |
Exposure Control
| Shutter Speed | 1/25000 – 1/8 Second (Photo)1/25000 – 60 Seconds (Photo)1/25000 – 1/30 Second (Video)1/25000 – 1/30 Second (Streaming) |
| Photo ISO Range | 100 – 1600 (Auto)64 – 3200 (Manual) |
| Video ISO Range | 64 – 6400 (Auto) |
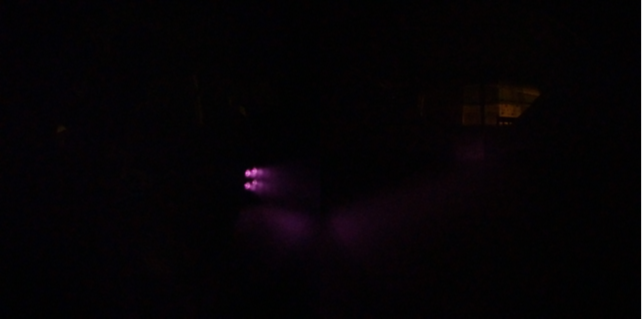
The Ricoh Theta V showed a resolution of 100*100 px, no matter which position the camera was in.
Picture with infrared light.
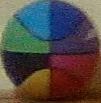
Front

Side
Its sensibility to infrared light is the highest of all the cameras tested.
Price
$429
($379 on sale)
Samsung Gear 360 4K Spherical VR Camera
| Image Sensor | 2 x 8.4 MP CMOS |
| Lenses | 2 x f/2.2 ultra-wide lenses |
| Max Video Resolution | 360° Dual Lens: 4096 x 2048 at 24 fpsSingle Lens: 1920 x 1080 at 60 fps |
| Video Format | MP4 (H.265) |
| Photo Capture Resolution | 360° Dual Lens: Up to 15 MP (5472 x 2736)Single Lens: Up to 3 MP (2304 x 1296) |
| Photo Format | JPEG |
| ISO | Up to 1600 |
| Mic | Built-in stereo microphone |
| Recording Time | Up to 130 minutes in 2560 x 1280 resolution at 30 fps |
| Battery | 1160 mAh |
| Card Slot | 1 x microSDXC card slot (supports up to 256 GB cards) |
| Supported Operating Systems | Android, iOS, Mac, Windows (360 Video Editor is not available for macOS computers) |
| Wi-Fi | 802.11 a/b/g/n/ac (2.4/5 GHz) |
| Bluetooth | 4.1 |
| Interface | 1 x USB 2.0 Type-C |
| Sensors | Gyro, accelerometer |
Picture with infrared light

Front

Side
The Samsung Gear has a resolution of 95*95 px when positioned straight front of the ball, and 143*133 sideways. This camera shows a high level of distortion at the latter position, and has a slightly lower resolution compared to both Thetas.
It proved somewhat sensible to infrared light, though noticeably less than that of both Thetas.
Price
$82.99
(though as of September 2019 price went up to $200)
Ricoh Theta S
Picture with infrared light
Front
Side
The Ricoh Theta S has, just as the Theta V, a resolution of 100*100 px for both sides. Its sensibility to infrared light was a bit less than that of the Theta V, but higher than that of the Samsung Gear.
Price
$269,32
Zision 360°Panoramic VR Full View Action Camera
Picture with infrared light

Side

Up
The Zision has a resolution of 166*166 px when positioned with its only lens facing the subject directly, but the picture shows highly distorted when positioned with the lens upwards.
Its sensibility to infrared light was poor, only a bit higher than that of the MadV.
Price
$59.99
Maginon View 360
50 euros (discount price)
Type of camera Full-spectrum camera for 360° spherical panoramas
Image sensor 2x 2MP CMOS sensor
Photo resolution 8 MP (4,000 x 2,000 | interpolated), 5 MB (3,200 x 1,600 | interpolated), 3 MP (2,592 x 1,296)
Video resolution 2.048 x 1.024 (30fps)
Lens 2x 210° super wide-angle lens
Aperture F = 2.0 | Focal length f: 0.88 mm
Recording time Up to 120 minutes with fully charged battery (without WiFi, 2048 x 1024 / 30fps)
Memory MicroSD card up to 32 GB (min. class 10 or faster)
Connections Micro USB connection
Power supply 1,300 mAh lithium-ion battery
Dimensions 137 x 45 x 14 mmWeight 83 g
Picture with infrared light

Front

Side
The Maginon has a resolution of 50*50, and showed a bit of distortion when the camera is positioned sideways. Its sensibility to infrared light was similar to that of the Zision.
Price
$110,00 ($55.00 in sale)
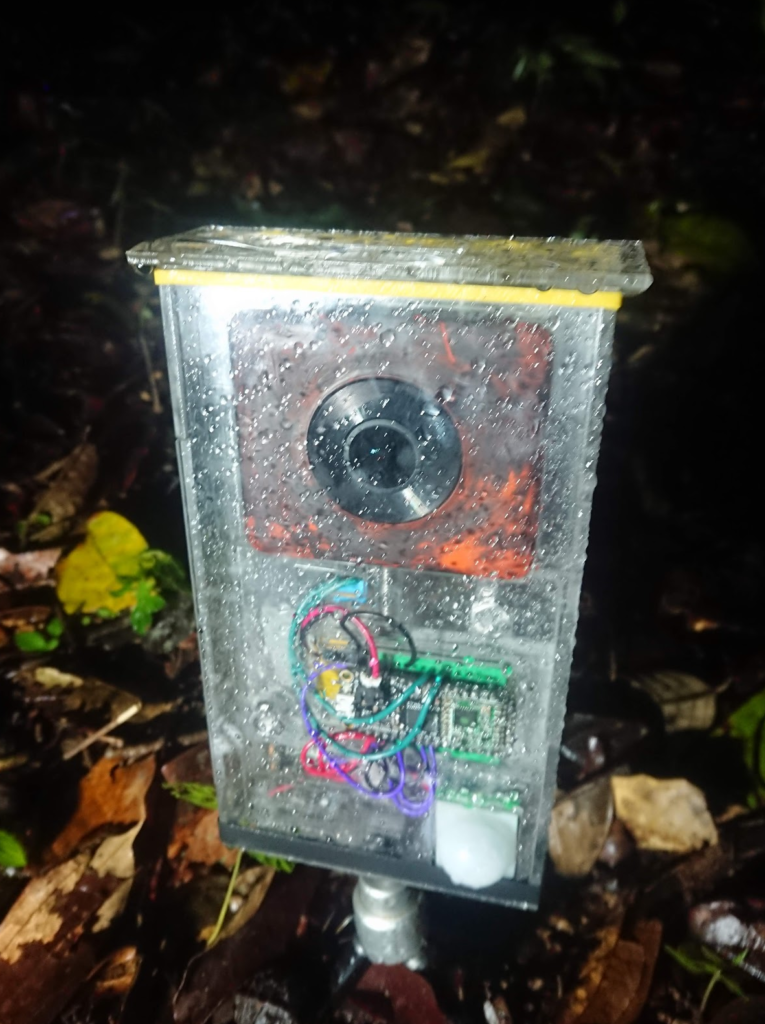
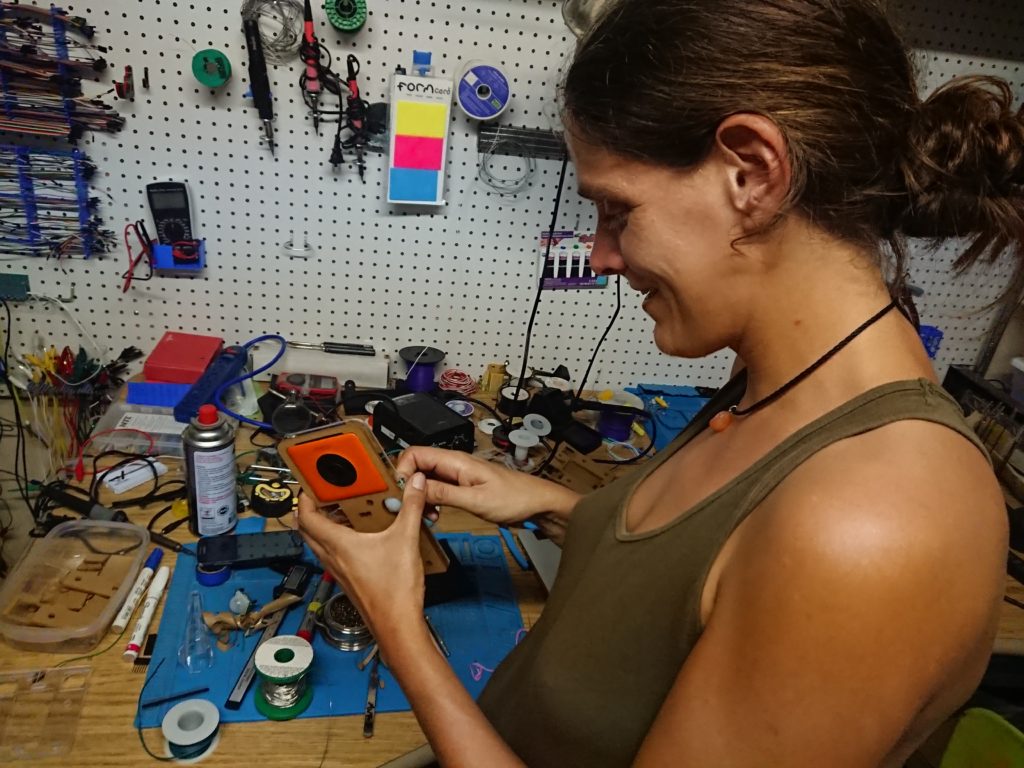
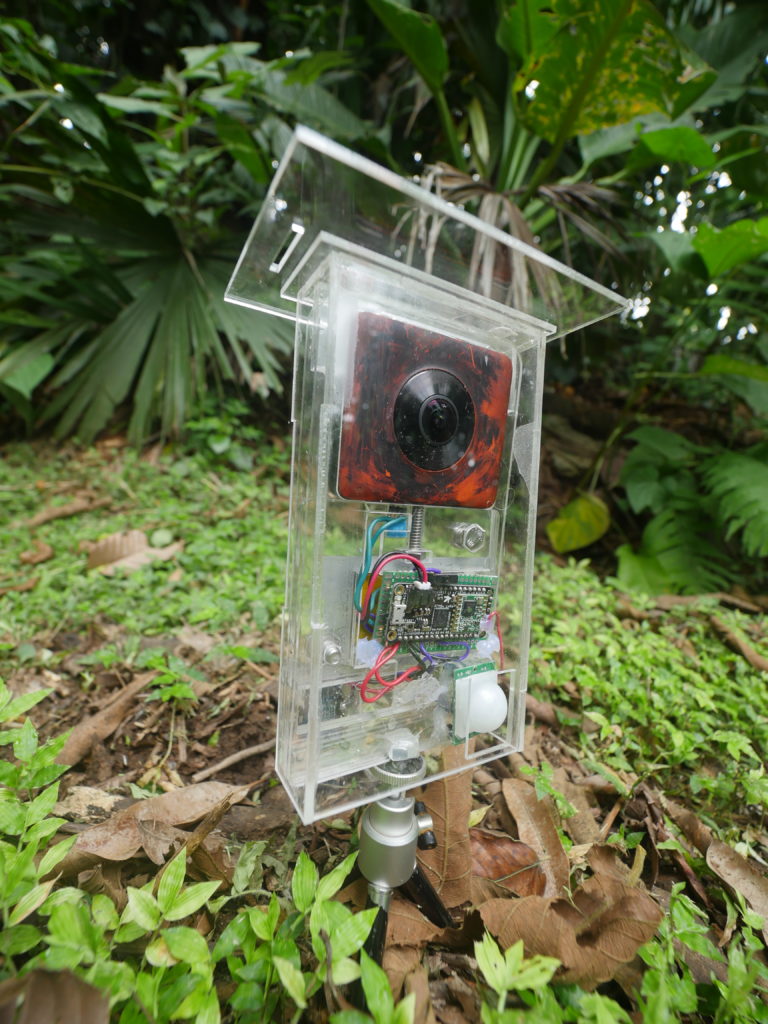
Panatrap-MADV: How-to Build
This guide will show you the steps necessary to turn a commercially available Xiaomi MADV (mijia) into a fully functioning, animal sensitive, weatherproof Camera trap!

Code
Code is available in this repo https://github.com/Digital-Naturalism-Laboratories/Panatrap/tree/master/MADV
Hardware
Physical Designs are available here for free download: https://a360.co/2nrPLd8
and included in the Github https://github.com/Digital-Naturalism-Laboratories/Panatrap/tree/master/MADV
Hacking Theory
The MADV designers made an interface on the bottom of the camera for the camera to be easily controlled with their included “selfie stick.” It’s just two metal electrode contacts that when connected it sends a message to the camera(the original selfie stick has a 220 ohm resistor connected to a button).
From our examinations, the 3 messages you can send to the camera with this interface are:
- Long Press (5 seconds)
- Camera ON/OFF
- Medium Press (2 seconds)
- Toggle Recording Mode (Video to Photo, or Photo to Video)
- Short press (0.5-1 seconds)
- Shutter Button (Take a photo, or start or stop a video)
Cut out or Print the Design
You will need to cut out two main parts of the design:
The Housing – These are the parts that will go around the camera and Arduino, and hold all the pieces together to make the project function
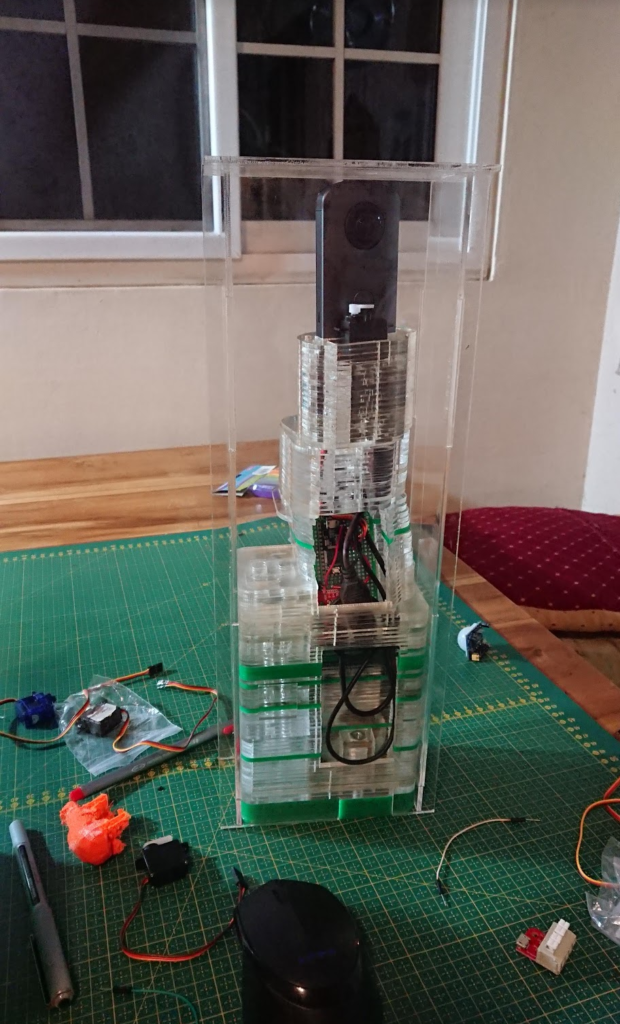
The Weather Shield – This is a 360-degree transparent case that lets the camera stand up again
In the link and the repo, these are 2-dimensional drawing files mean to be laser cut from 3mm acrylic. The full 3D model is there, though, so you could 3D print the housing instead if you don’t have a laser cutter.
I kept the the weather shield quite simple in design as well, so if you do not have a laser cutter, you can pretty much just make a box from clear acrylic that goes aroundDIY
DIY Pogo Pins / Prepare the Contact Connector
Ideally you would have these things called “Pogo pins” which are little spring mounted pins that press against electrical contacts such as those on the bottom of your MADV. If you have those, great! solder wires to two of them with one header pin space in between.
If you are out in the jungle, and don’t have Pogo pins, though, we can make our own ones. You just need:
- Standard Male Header pins (3 linked together)
- Chunk of hard rubber (we used a piece of our silicone soldering mat)
- 2 wires
Take your set up 3 header pins, chop off the middle pin, and stab them all into the hunk of rubber cut to the size of the area in the camera housing for the electrodes. Solder two wires to the outside pins. They should line up directly with the electrical contacts of the camera. The rubber gives the mechanism some squishiness, so you can ensure a good contact with the camera.
Connect all the Electronics
Now you just need to connect the components together!
The camera has two electrical contacts you just put together. The wire running to the contact closest to the center of the camera should go to the GND pin on your arduino.
The outside wire contact should go to pin 12 on your arduino.
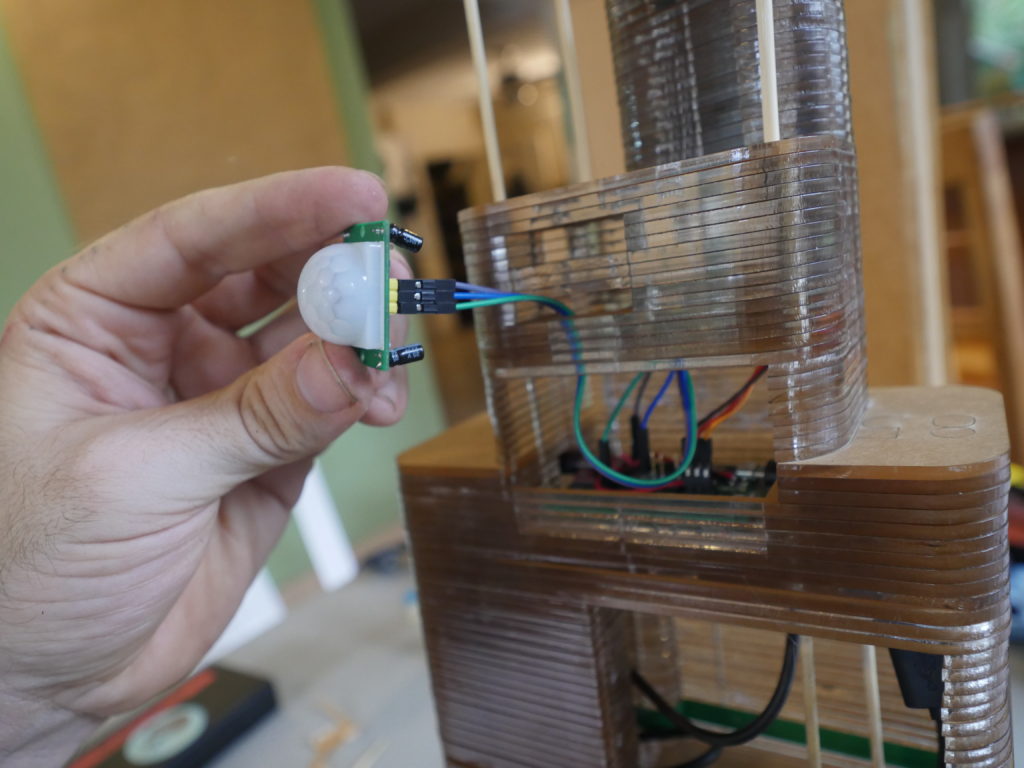
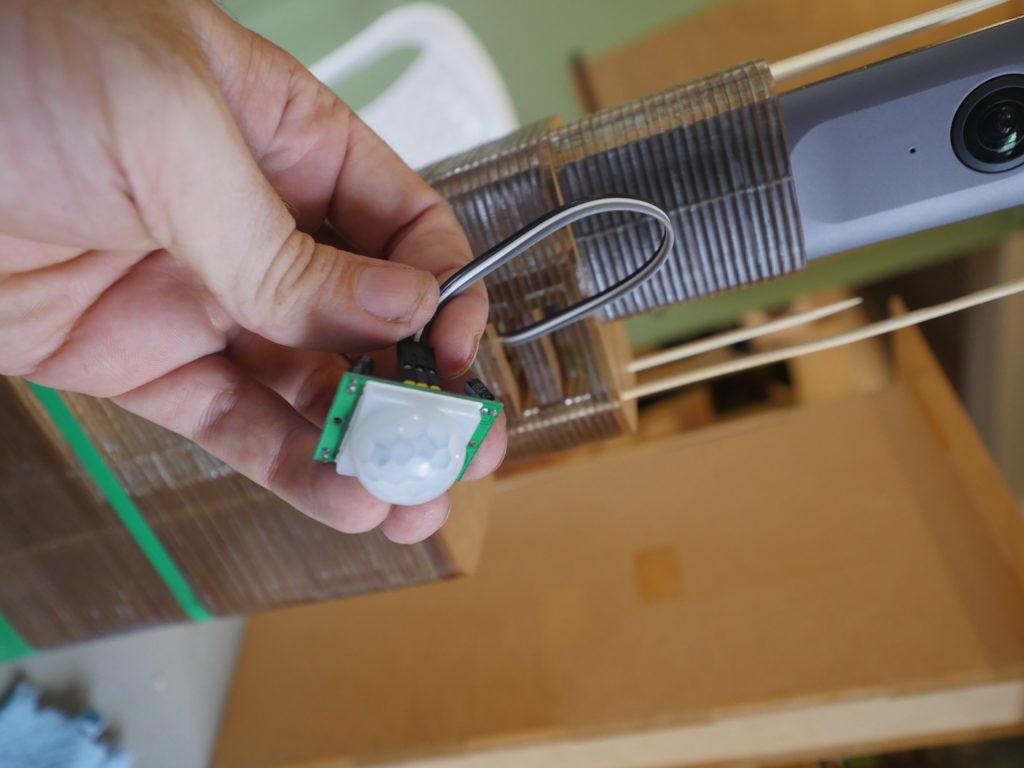
Now you just need to connect the PIR motion sensors.
PIR
If you are using a 5V power source,
simply connect the Vin lines on the PIRs to the 5V on the arduino
The GND to the GND on the Arduino
and the OUT pins on the PIR to pins A4 and A3 on your arduino
Program
The code is all up at: https://github.com/Digital-Naturalism-Laboratories/Panatrap/blob/master/MADV/Code
This first, simple sketch should let you debug easily and make sure your PIR’s are working and your camera is triggering and shutting down correctly
/*
  PanaTrap - MADV
  Debug Code for the turning the Xiaomi MiSphere (MADV) camera
  into a remotely controlled,
  PIR triggered, Camera Trap
*/

/* in order to trigger the MADV camera to change modes, in theory you should connect a relay to your arduino, and trigger that to connect the nodes of the MADV
  //But we are trying to use minimal hardware, and found that if you connect the node closest to the center of the camera to the ground, and then
  //Connect another digital pin  to the other node
  //Initially set the digital pin to HIGH, and then when you pull it LOW
  //it will trigger the camera
  - Long Press (5 seconds)
  - Camera ON/OFF
  - Medium Press (2 seconds)
  - Toggle Recording Mode (Video to Photo, or Photo to Video)
  - Short press (0.5-1 seconds)
  - Shutter Button (Take a photo, or start or stop a video)
*/

//Front PIR motion sensors
int fPIR = A4;
int fPIRval = -1;

//Back PIR motion sensors
int bPIR = A3;
int bPIRval = -1;

//camera trigger operants

int trigger = 12;
int gndtrigger = 9;


//LED for debugging display
int led = 13;


void setup() {
  //Serial for debugging PIRs
  // initialize serial communication at 9600 bits per second:
  Serial.begin(9600);

  //Turning some of the pins on the camera into virtual Power sources and Grounds
  pinMode(A1, OUTPUT);
  digitalWrite(A1, LOW);

  pinMode(A2, OUTPUT);
  digitalWrite(A2, HIGH);

  pinMode(A5, OUTPUT);
  digitalWrite(A5, LOW);


  //Camera Trigger stuff
  pinMode(led, OUTPUT);
  pinMode(trigger, OUTPUT);
  pinMode(gndtrigger, OUTPUT);

  digitalWrite(led, HIGH);

  digitalWrite(trigger, HIGH);
  digitalWrite(gndtrigger, LOW); //**Andy note A

}

// the loop routine runs over and over again forever:
void loop() {
  // read the input on analog pin 0:
  fPIRval = analogRead(fPIR);
  bPIRval = analogRead(bPIR);
  // print out the value you read:
  Serial.print(fPIRval);
  Serial.print("    rear:  ");
  Serial.println(bPIRval);


  if (fPIRval > 600 || bPIRval > 600) {
    critterDetected();
  }
  delay(1);        // delay in between reads for stability
}

void critterDetected() {

  Serial.println("Critter detected");
  //Turn camera on
  onOffCamera();

  //Take a photo
  takePhoto();
  takePhoto();

  //TODO: Wait to see if other critters still around
  //before we shut off camera

  //TODO: the camera will toggle between photo and video each time it shuts off, add in a toggle here

  onOffCamera();

}

void onOffCamera() {
  Serial.println("cameraONOFF");

  //5 second turn on
  digitalWrite(led, LOW);
  digitalWrite(trigger, LOW);
  digitalWrite(gndtrigger, LOW);
  delay(5000);

  ///Chill
  digitalWrite(led, HIGH);
  digitalWrite(trigger, HIGH);
  digitalWrite(gndtrigger, LOW);
  delay(2000);
}

void takePhoto() {
  Serial.println("Take photo");

  //Take a photo
  digitalWrite(led, LOW);    // turn the LED off by making the voltage LOW
  digitalWrite(trigger, LOW);  // turn the LED on (HIGH is the voltage level)
  digitalWrite(gndtrigger, LOW);
  delay(1000);               // wait for a second

  ///Chill 4 secs
  digitalWrite(led, HIGH);
  digitalWrite(trigger, HIGH);
  digitalWrite(gndtrigger, LOW);
  delay(4000);

}

void togglePhotoVideo() {
  Serial.println("cameraTogglePhotoVideo");

  //2 second press
  digitalWrite(led, LOW);
  digitalWrite(trigger, LOW);
  digitalWrite(gndtrigger, LOW);
  delay(2000);

  ///Chill
  digitalWrite(led, HIGH);
  digitalWrite(trigger, HIGH);
  digitalWrite(gndtrigger, LOW);
  delay(2000);

}
Charge all your devices
In this build, the MADV has its own internal battery, and the Arduino is connected to its own re-chargeable LIPO
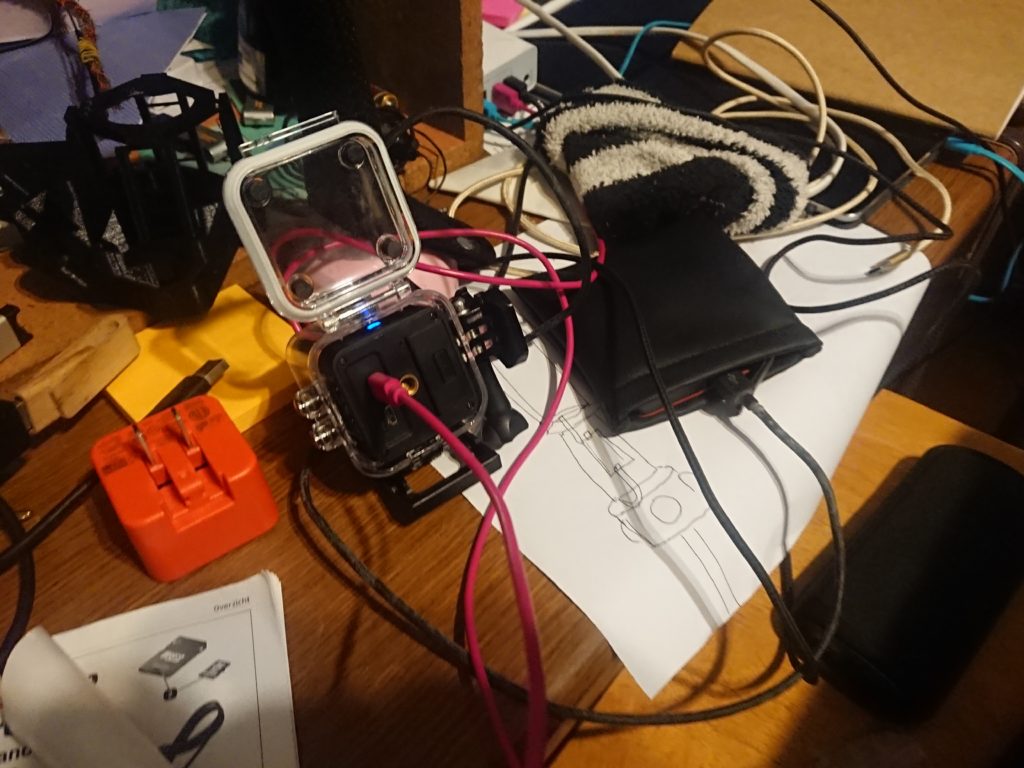
Assemble and Deploy
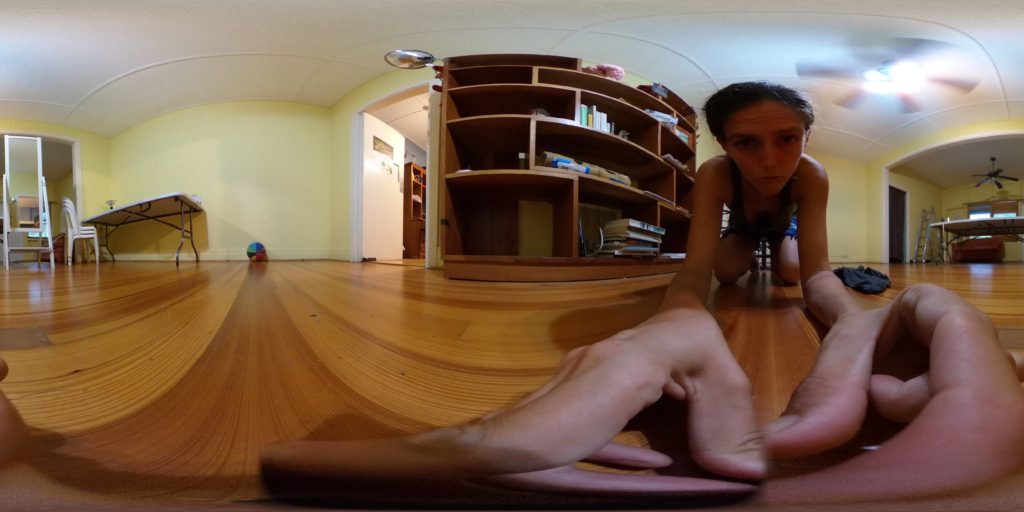
Now that it is ready, give the PIR’s a quick wave, and test that everything is triggering. Now set it in the target environment, and test it again by jumping in front of it and seeing if you can detect it. (You will have lots of 360 selfies with testing this camera).
If it all seems good, leave it there and come check on it in a couple hours or days and see what you caught!
Panatrap- Servo (Theta V): How-to Build
Code
Code is available in this repo https://github.com/Digital-Naturalism-Laboratories/Panatrap/tree/master/Theta_V
Hardware
Physical Designs are available here for free download: https://a360.co/2m22suQ and included in the repo
Materials
- Theta V camera (~$350 USD)
- Teensy 3.2 Arduino Microcontroller (~$15)
- USB Micro breakout board https://www.sparkfun.com/products/12035
- PIR motion detector (5V) x2
- Small Servo motor
- Proto board
- Male Header pins
- USB battery pack with On-Off Switch (~ $24)
(Specifically this one: Talent Cell 3000 mAh – https://www.amazon.com/gp/product/B01M7Z9Z1N/ref=ppx_yo_dt_b_asin_title_o01_s01?ie=UTF8&psc=1 ) - 3mm bamboo skewers (you can find these at a grocery store)
- 3mm Acrylic Sheets and Laser Cutter (preferred for this build)
OR - 3D Printer and Filament
Tools
- Acrylic Welding Glue (or Super glue)
- Soldering Iron
- Wires
Hacking Theory
The Theta cameras (and many other 360 cameras) were substantially more locked up in our attempts to remotely operate it (especially in a way that allows for long term use and have a decently quick trigger).
You can follow our detailed journey through hunting ways to control this camera here:
https://community.theta360.guide/t/usb-api-and-arduino-for-camera-trap/4758/20
Andy put in several weeks of work exploring every possible method of hacking this camera.
The camera runs android, and has an accessible USB Api (to recieve PTP commands) and in theory has all the abilities to remotely A) Turn ON/OFF and B)Trigger a Photo Capture. But the firmware blocks some of these features (even if you switch into developer mode).
Turning On/OFF
It’s tough to turn this camera on. Two ways we have found to hack it on are:
-When you send a fake keyboard command through an OTG cable
or
-When a connected Raspberry Pi boots up (unfortunately this is too slow to work as a camera trap)
Luckily we discovered that sending an emulated Keyboard command (through something like a Teensy Arduino 3.2), can remotely wake up the camera (even though this feature is not documented anywhere!), and then we just need to trigger the photo.
Triggering – Servo Style
The photo triggering is then done by a small servo connected to the Arduino which manually taps the shutter button of the camera. The servo is shut down in between photos to reduce power consumption.
We tried a zillion other ways to remotely trigger this camera, but none will work unless the camera is already turned on manually and set into “Plugin Mode”
Build Process
Create Circuit Board
The circuitry is decently simple for this build. You have two inputs (the 2 PIRs), 1 servo, and a USB breakout you need to connect to the TEENSY 3.2
Solder some headers down the right side of your teensy.
Create extra V+ and GND
Solder a wire to the Vin ( second from the top right pin of teensy) and run these to a space where you can have at least 4 more voltage out pins on the proto board
Solder a wire to the GND (third from top right of teensy), and run these to a separate space where you can have at least 4 more GND pins to plu in the servo, PIRs and USB breakout
Connect peripherals
Servo: Solder 3 male header pins and attach one side to Vin, one side to GND, and the center pin to the Servo pin in your code
PIR x2 : Solder 3 male header pins and attach one side to Vin, one side to GND, and the center pin to the Servo pin in your code
USB breakout: Solder the VCC to the Vin, and the GND to the GND on the teensy

Program the Board
Code is available in this repo https://github.com/Digital-Naturalism-Laboratories/Panatrap/tree/master/Theta_V
You can upload this code for a quick easy way to help debug all the parts
/*
PanaTrap - Theta V
Debug Code for the turning the Ricoh Theta V camera
into a remotely controlled,
PIR triggered, Camera Trap
Using the Teensy 3.2
This camera is unfortunately blocked in lots of parts of its API from being able to just control with digital signals
so we control it two ways
Wake up: Sending a Fake Keyboard Command
Take Photo:
Trigger a servo to physically press the button
Note: if the button is held down WHILE the camera is waking up, it will NOT take a photo, thus there is some timing trickiness here
Note: make sure to set the Teensy on Serial+Keyboard+Mouse+Joystick
Note: we are using the Teensy 3.2 because it can send virtual HID signals, and it is the only one I had that was 5V tolerant (which i only had 5V PIRs)
*/
#include <Servo.h>
Servo myservo;
// create servo object to control a servo
// twelve servo objects can be created on most boards
int offpos = 160;
int onpos = 180;
//Front PIR motion sensors
int fPIR = A5;
int fPIRval = -1;
int fPIRpower = 22;
int fPIRgnd = 20;
//Back PIR motion sensors
int bPIR = A2;
int bPIRval = -1;
int bPIRpower = 19;
int bPIRgnd = 17;
//LED for debugging display
int led = 13;
int detectionThreshold = 600; // Our PIRs are actually just binary, but setting up infrastructure in case other sensors are used
void setup() {
//Serial for debugging PIRs
// initialize serial communication at 9600 bits per second:
Serial.begin(9600);
digitalWrite(led, HIGH);
//Configure the mouse (im not sure we actually have to do this
Mouse.screenSize(1920, 1080); // configure screen size
//Setup Servo and put it into waiting position
myservo.attach(23);
myservo.write(offpos);
delay(1000); // You have to wait before detaching the servo for it to actually move into position
myservo.detach();
}
void loop() {
fPIRval = analogRead(fPIR);
bPIRval = analogRead(bPIR);
// print out the value you read
Serial.print(" Front PIR: ");
Serial.print( fPIRval);
Serial.print(" rear: ");
Serial.println(bPIRval);
Serial.println( analogRead(A3));
//For the debug code we are just gonna run a simple routine, Field code should have timeouts, and all kinds of other stuff
if (fPIRval > 600 || bPIRval > 600) {
critterDetected();
}
delay(1); // delay in between reads for stability
}
//For our Debug code, we are going to just Turn the camera on, and take two photos, or
//conveniently, if we are in Video mode, we will start and stop a video
void critterDetected() {
Serial.println("Critter detected");
//Turn camera on
onOffCamera();
//Take a photo
takePhoto();
takePhoto();
//TODO: Wait to see if other critters still around
//before we shut off camera
//The theta cannot turn off, just turns on
//It is set to go to sleep after 3 mins, so we just leave it on in case we catch another critter
//onOffCamera();
}
void onOffCamera() {
Serial.println("cameraONOFF");
digitalWrite(led, LOW);
//Wake the Camera with a Pulse
Mouse.set_buttons(1, 0, 0);
myservo.attach(23);
myservo.write(offpos); // This keeps the camera from just swinging to a random position
//Wake the Camera with a Pulse
delay(50); // Wait for a quick click
Mouse.set_buttons(0, 0, 0);
//Let camera wake up
delay(900);
///Chill
digitalWrite(led, HIGH);
}
void takePhoto() {
Serial.println("Take photo");
myservo.attach(23);
myservo.write(onpos);
delay (1200);//hold for like 1.2 seconds
//Take a photo
digitalWrite(led, LOW); // turn the LED off by making the voltage LOW
//Set back to resting mode
myservo.write(offpos);
delay(200); //Need a delay or else it detaches before it finish moving
myservo. detach();
///Chill 4 secs // Camera needs 4 seconds to process between photos
delay(4000);
digitalWrite(led, HIGH);
}
void togglePhotoVideo() {
Serial.println("cameraTogglePhotoVideo");
//2 second press
digitalWrite(led, LOW);
delay(2000);
///Chill
digitalWrite(led, HIGH);
delay(2000);
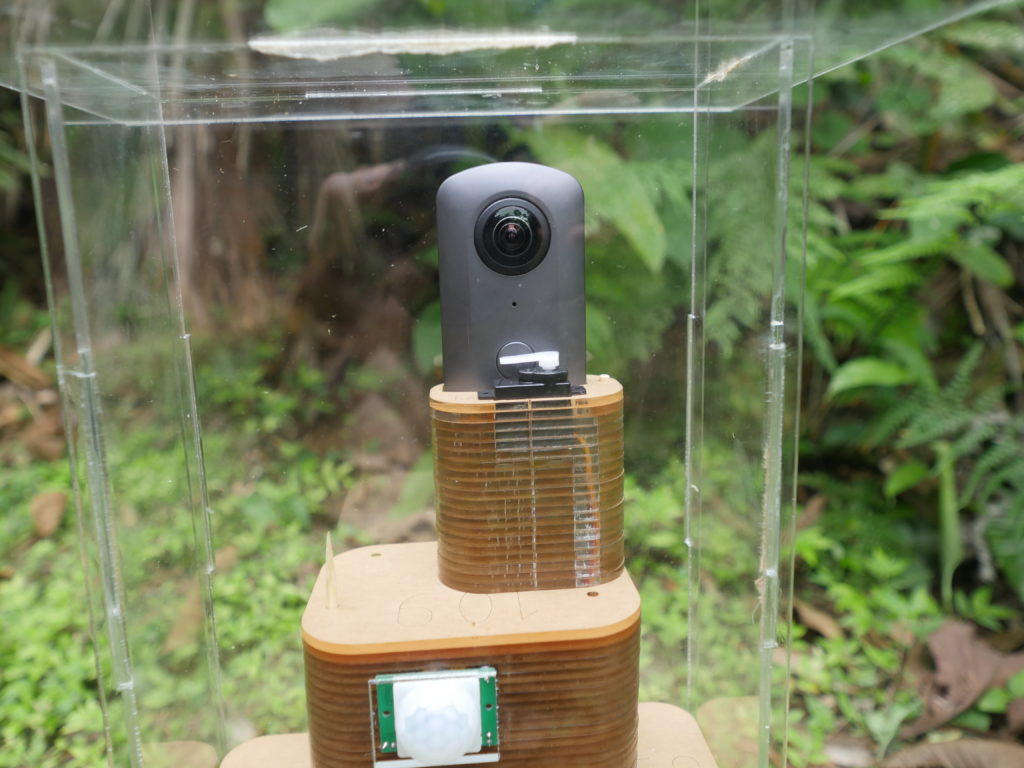
}Create Housing
If using a 3D printer, use the model provided above, and print it out!

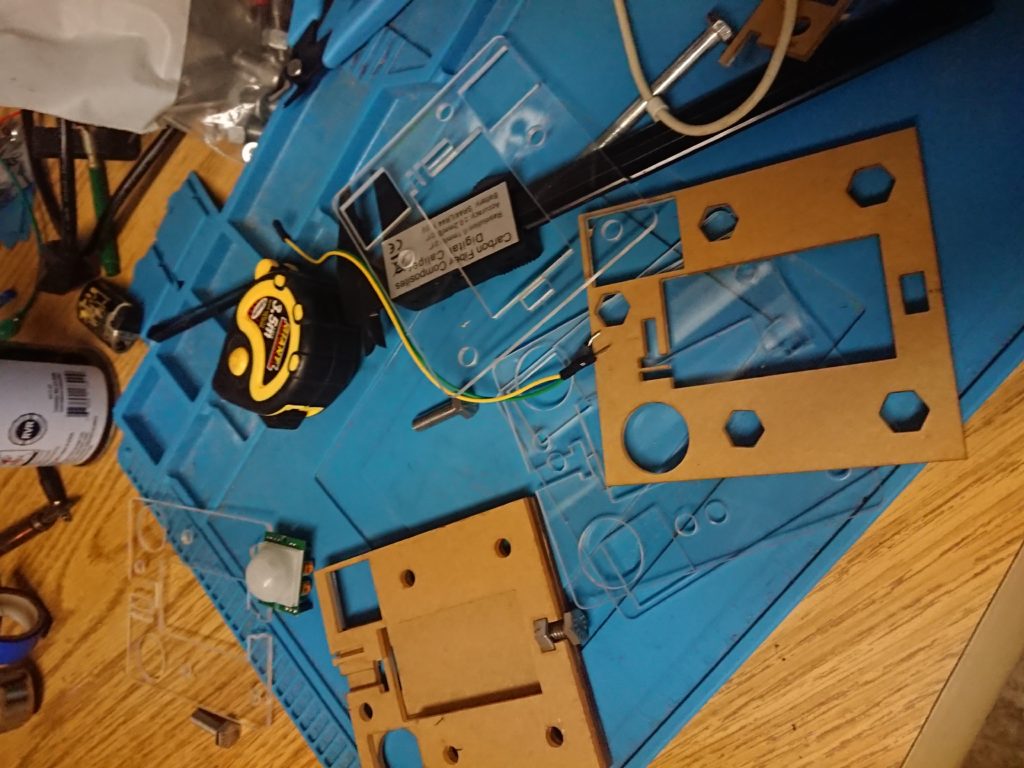
If using a Laser cutter, Cut out the housing pieces (auto-generated from the model by Autodesk’s slicer program)


Assemble
Stack all the slices together, and use the bamboo skewers to hold them together temporarily.
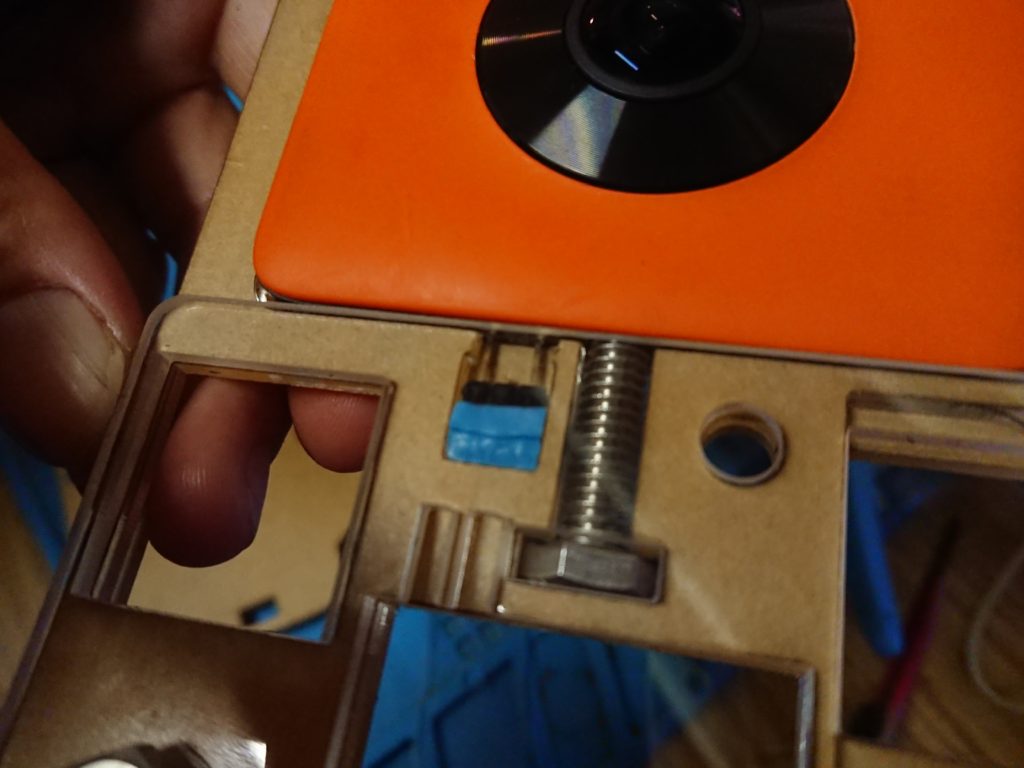
Make sure all your components fit! (or else you might need to dremel some modifications like i did here)


Next you might want to hot glue the circuit board in place.
Now use Female-female jumper wires to connect your PIR sensors to the header pins you installed.
Connect the Servo wires directly to the 3 pin header you installed

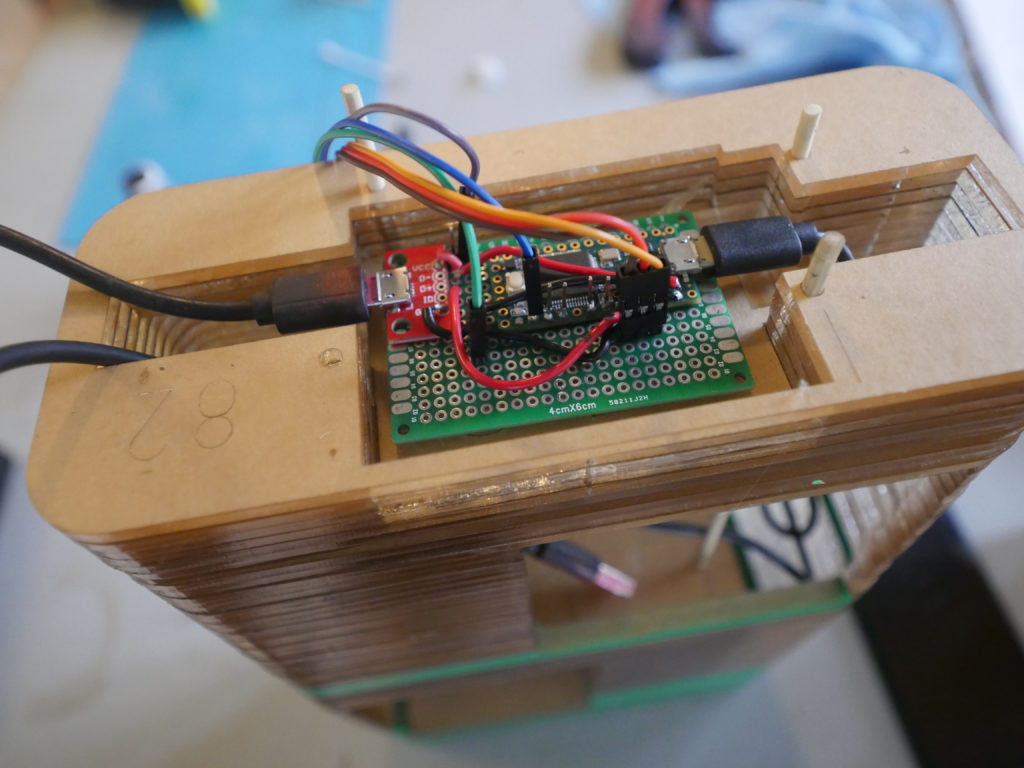
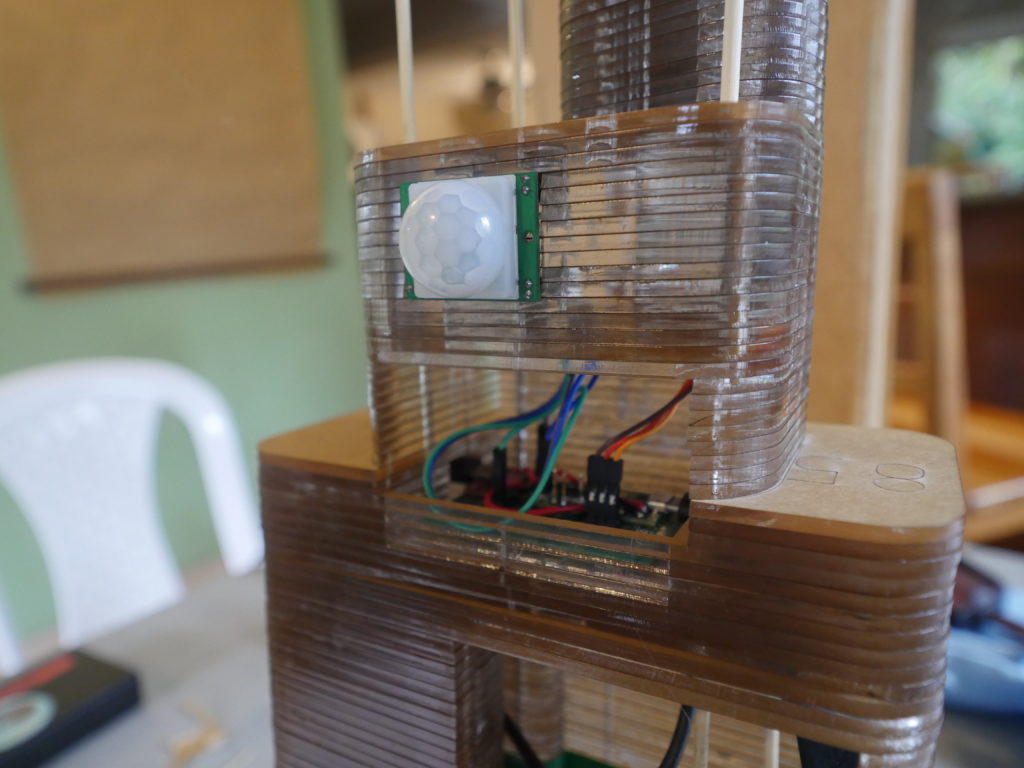
If everything looks good, connect the battery pack power to the USB breakout, and the OTG cable to the Theta Camera. Now connect the final USB from the teensy to the OTG cable. Test and see that it all works!
If everything looks good, you can superglue the stacks together. I leave the bamboo skewers in to make sure they are aligned perfect. I use acrylic weld, which works better than superglue, but it is all ok, the superglue will just leave some marks.


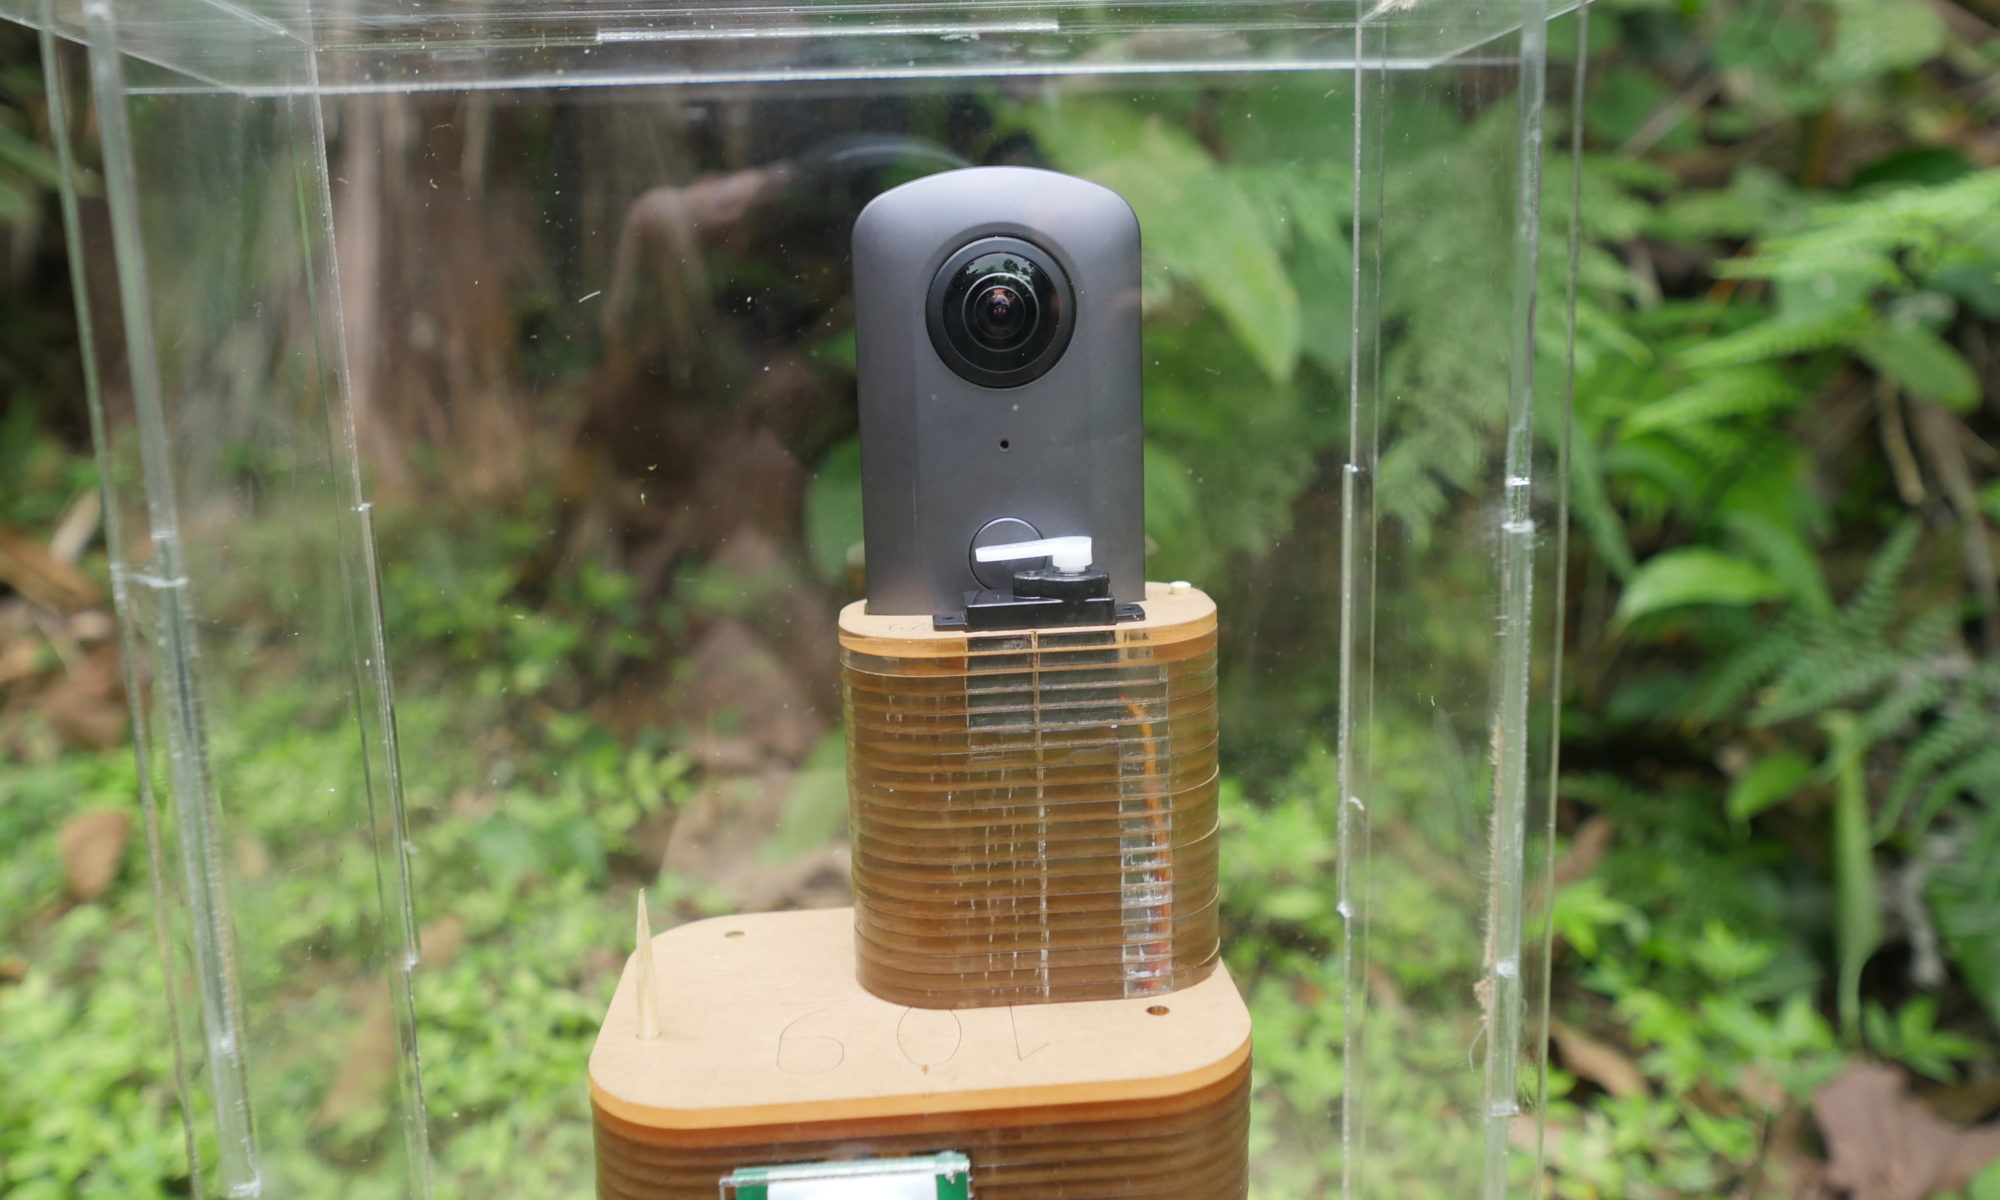
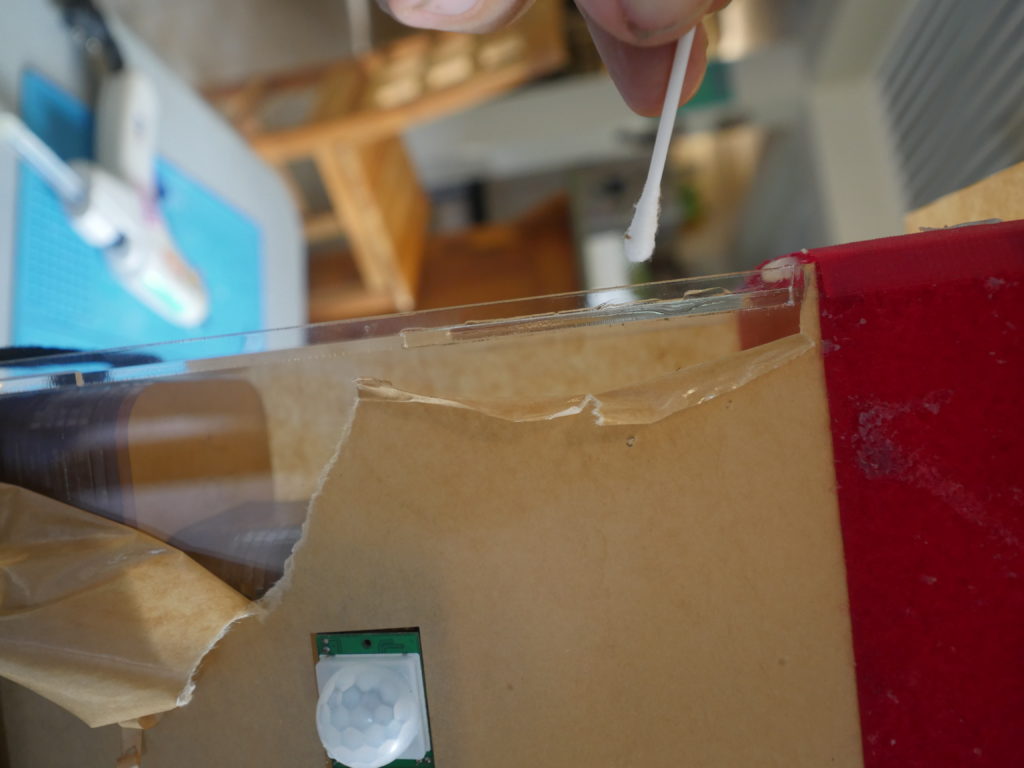
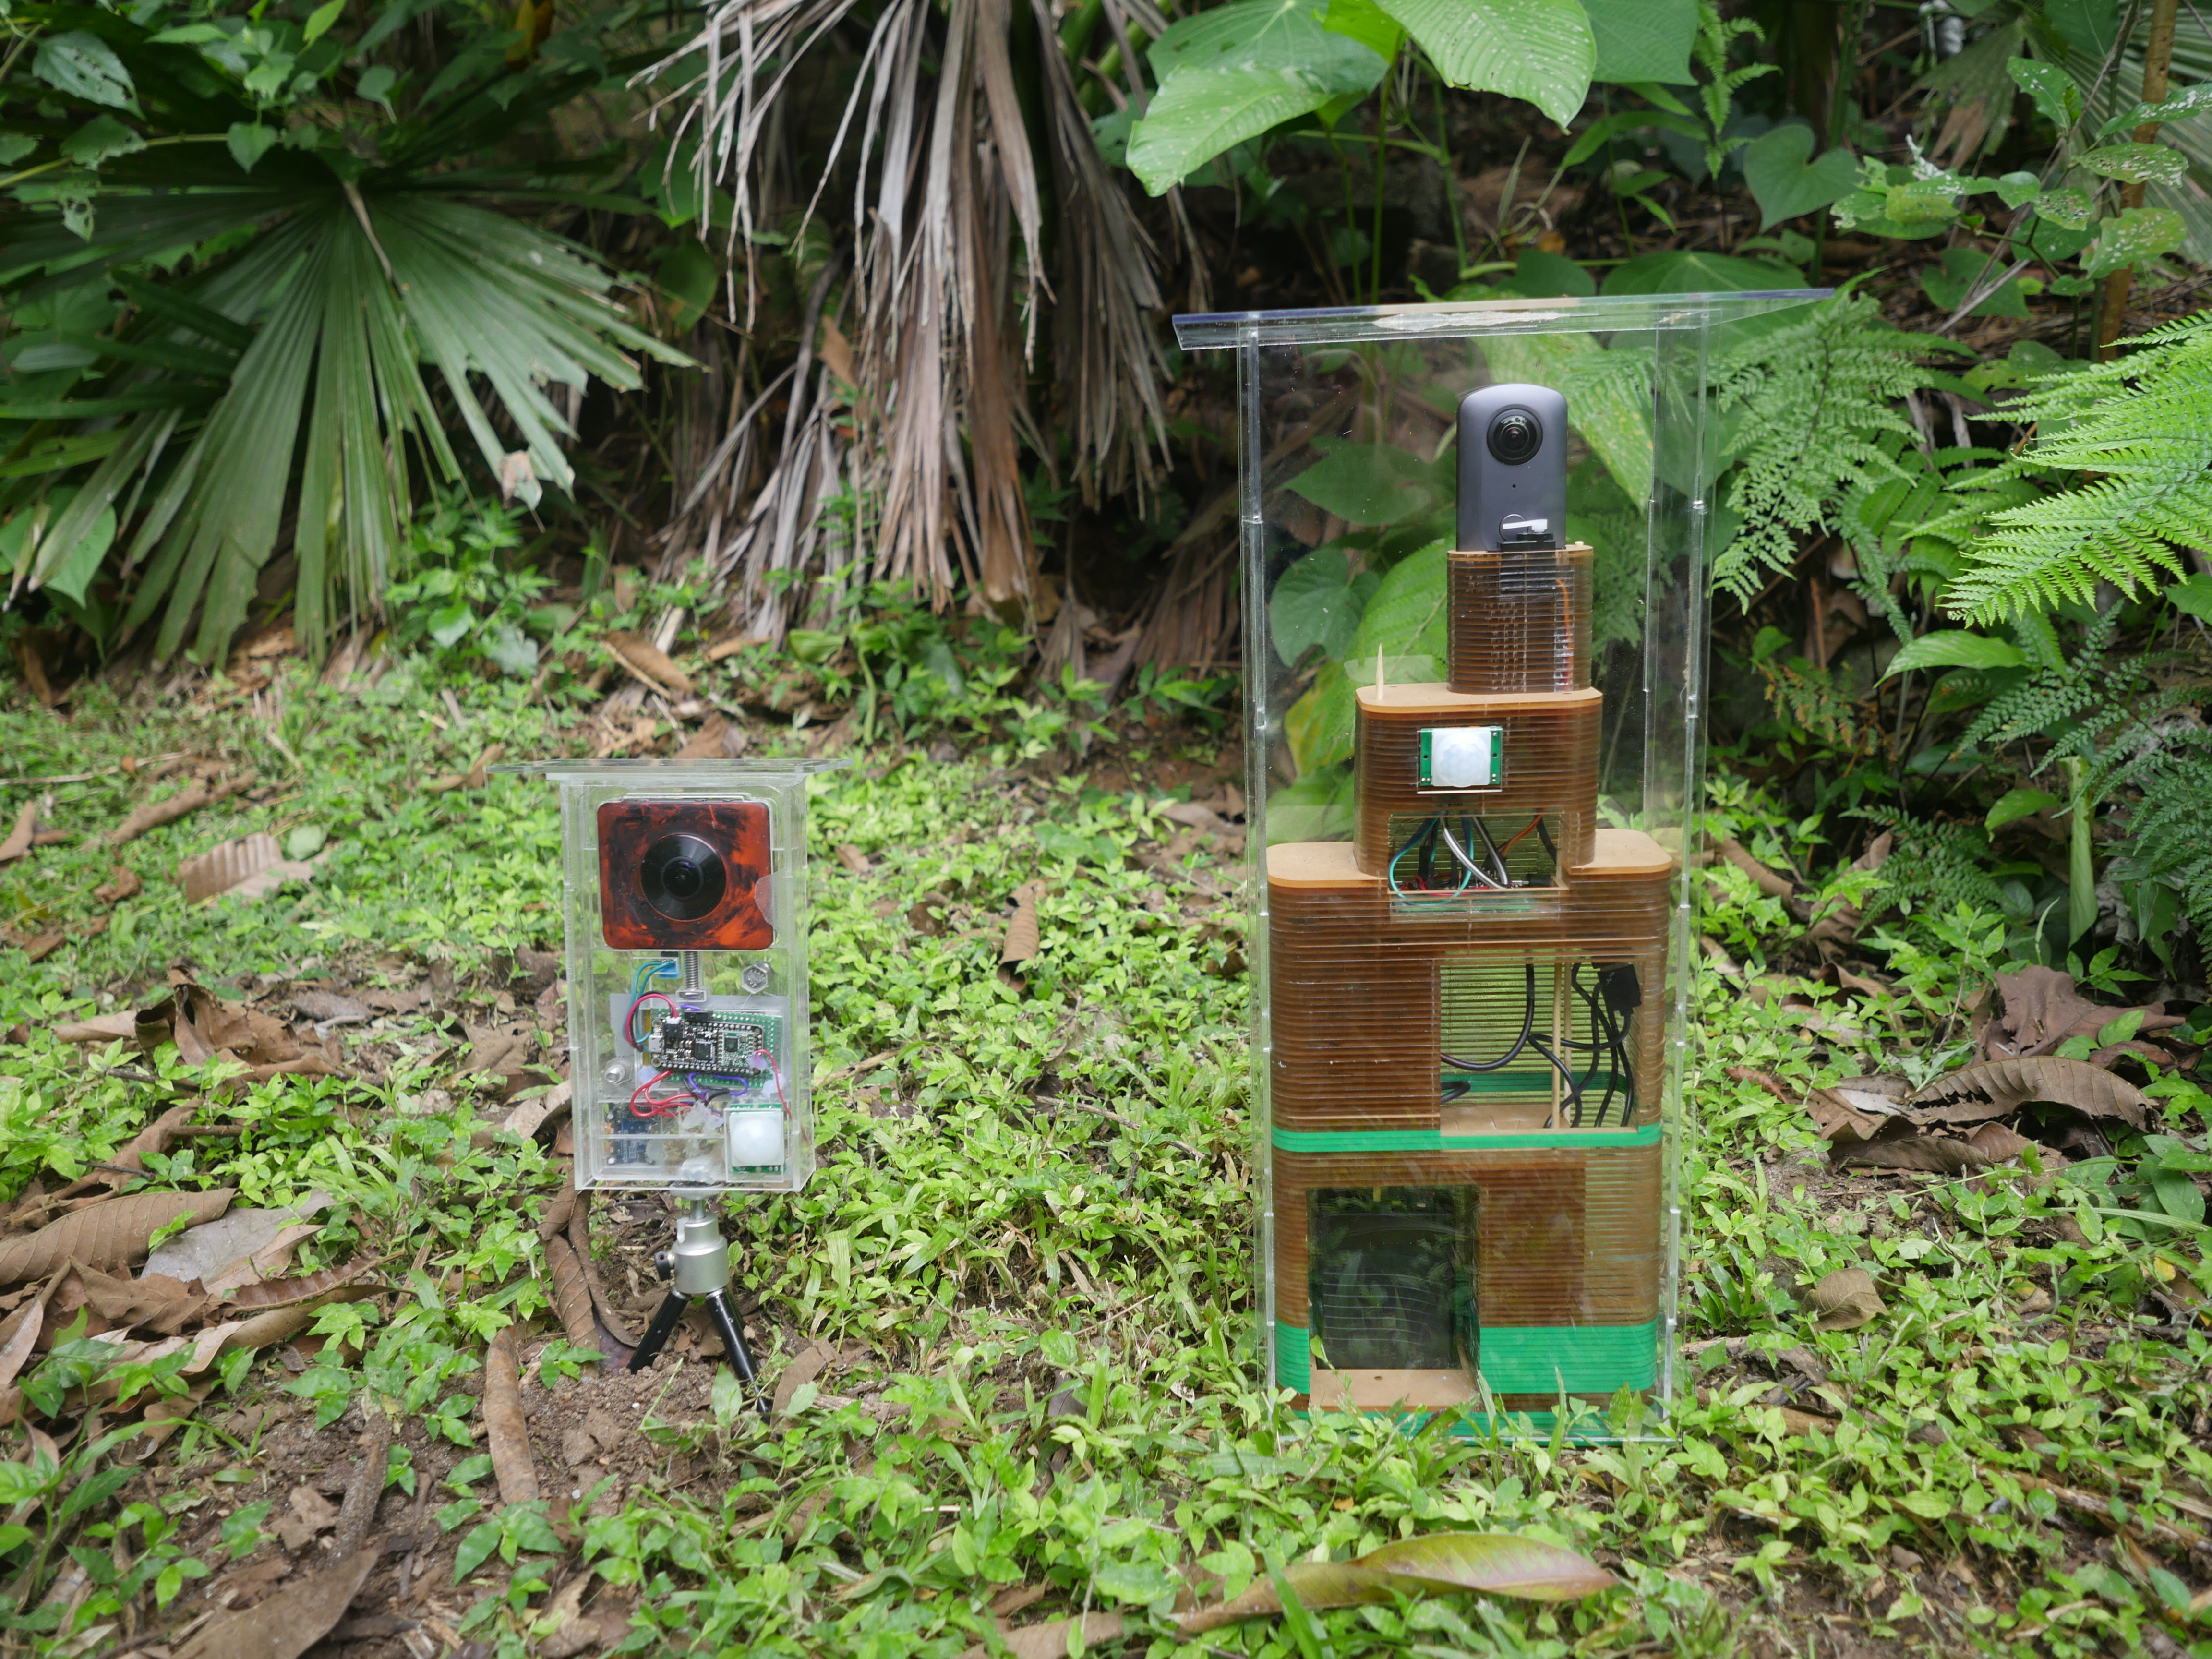
Weather Shield
The final part of the housing will be to glue together the weather shield. This is just a big clear plastic box with a roof and some spaces to let the PIR motion detectors look through.
For the weather shield you want this to be as clear as possible, so i leave the protective film on the acrylic as long as possible, and just try to just the acrylic weld with a q-tip. You want to clamp and holder everythign in place. I used some velcro straps and some clamps. Let it sit for an hour at least.

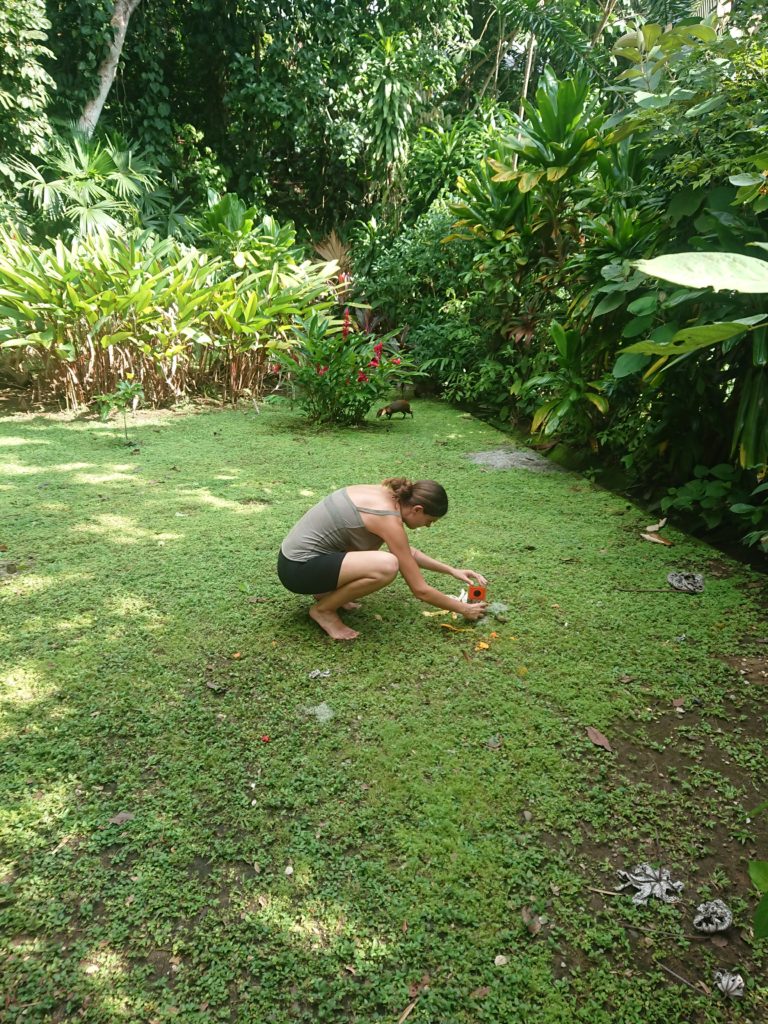
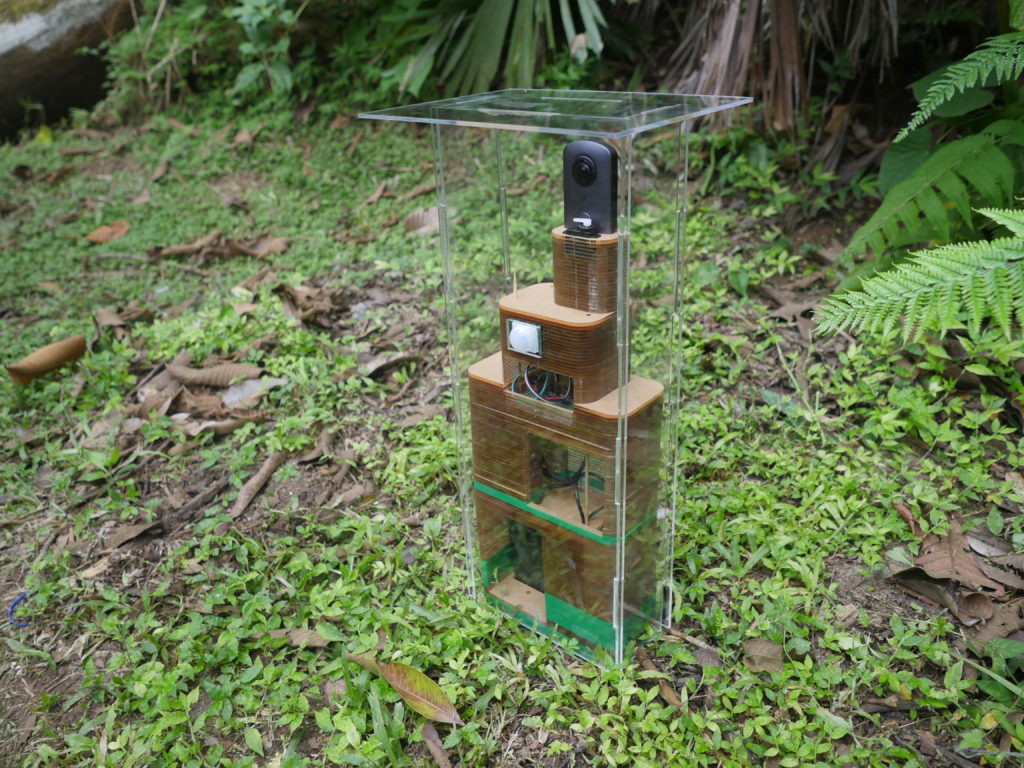
Deploy
Now your device should be ready to be set out in the forest, waiting for interesting creatures to come by!
Future Development
This design is large and durable, but a bit bulky. Future designs and slim it down, and allow for more mobility.
Our DIY weather shielding works great, but it does leave a large gap between the camera and the shield which can cause glare and reflections and cut down on some of your POV.
Panatrap – Open Source 360 Camera Traps
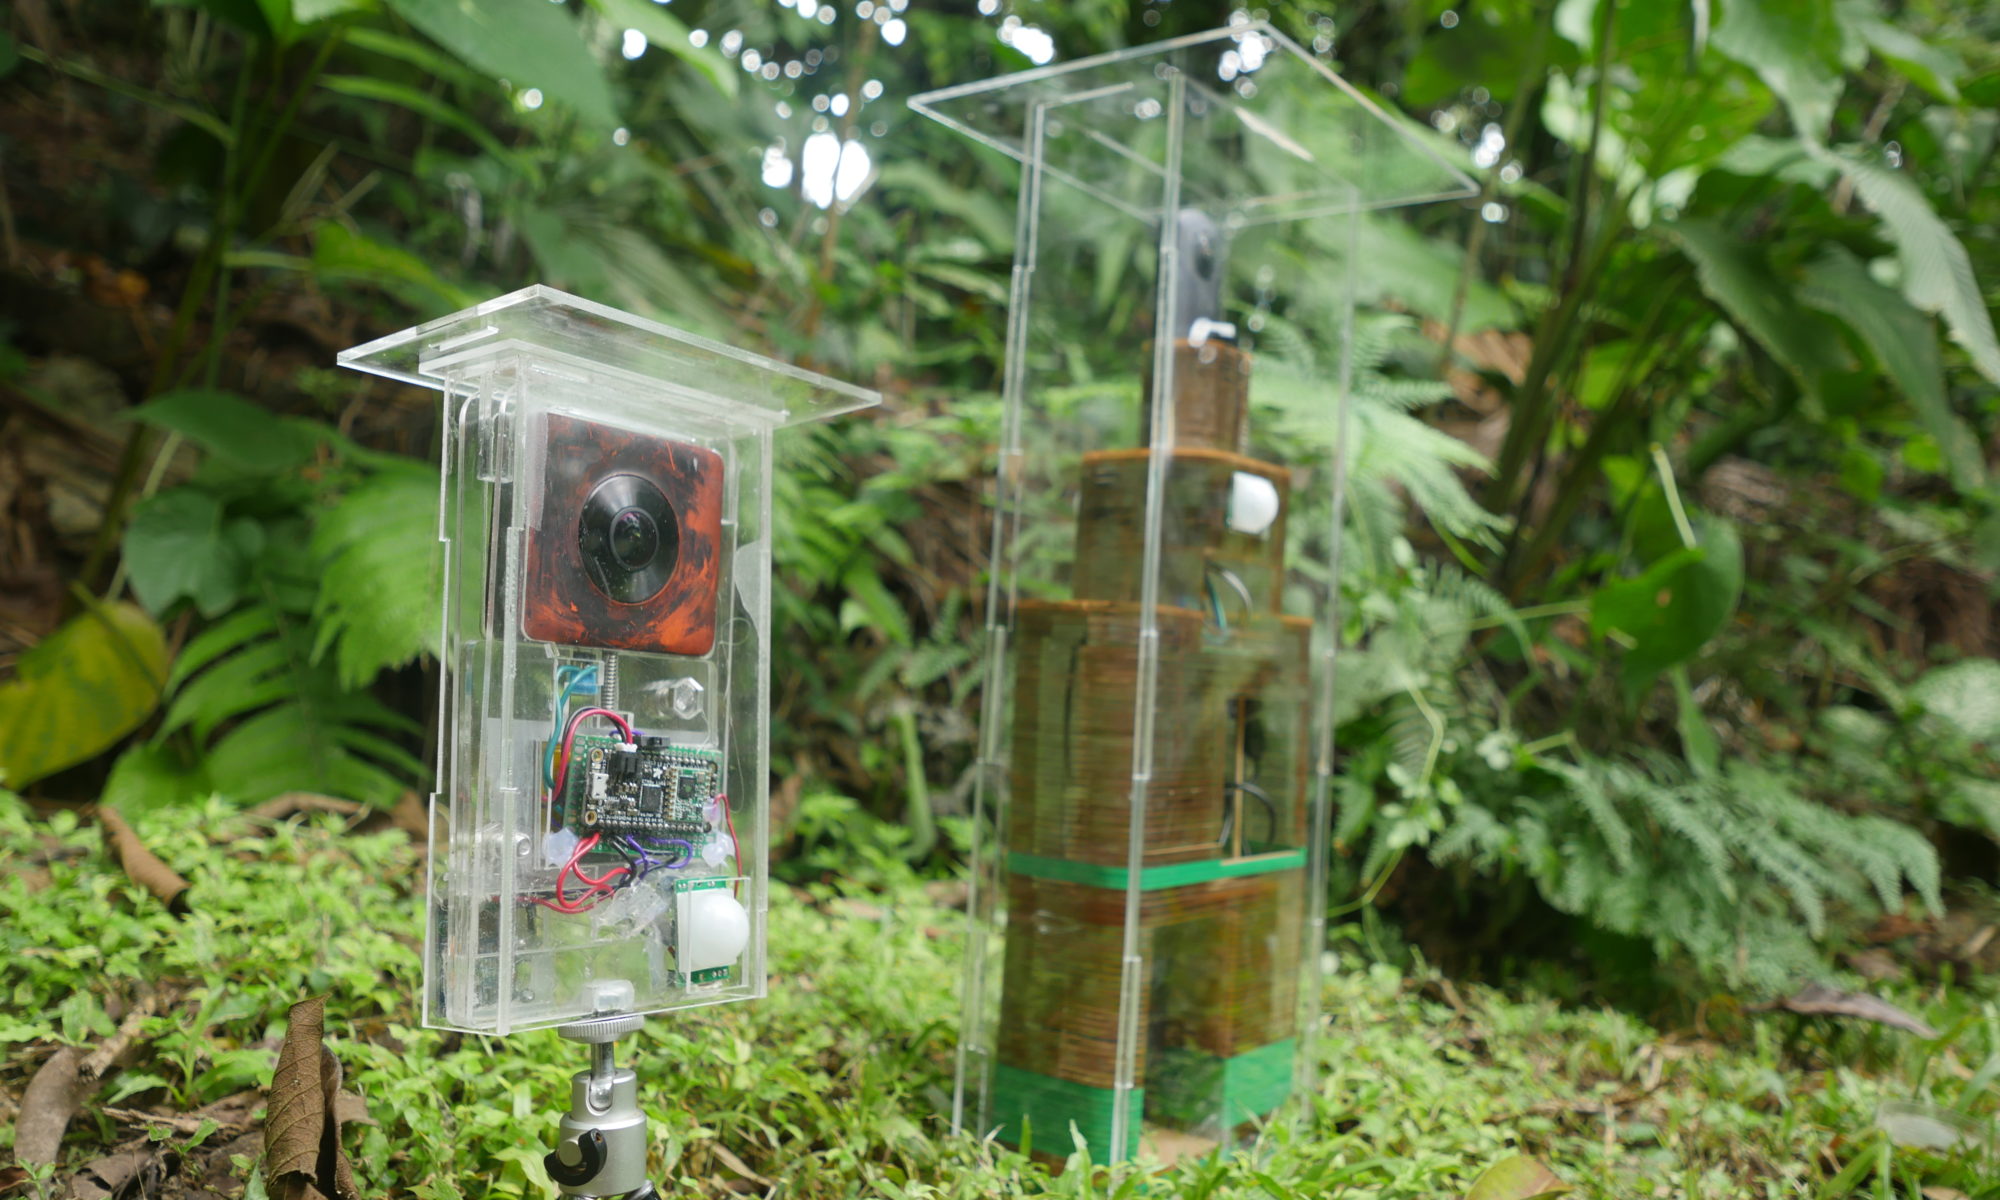
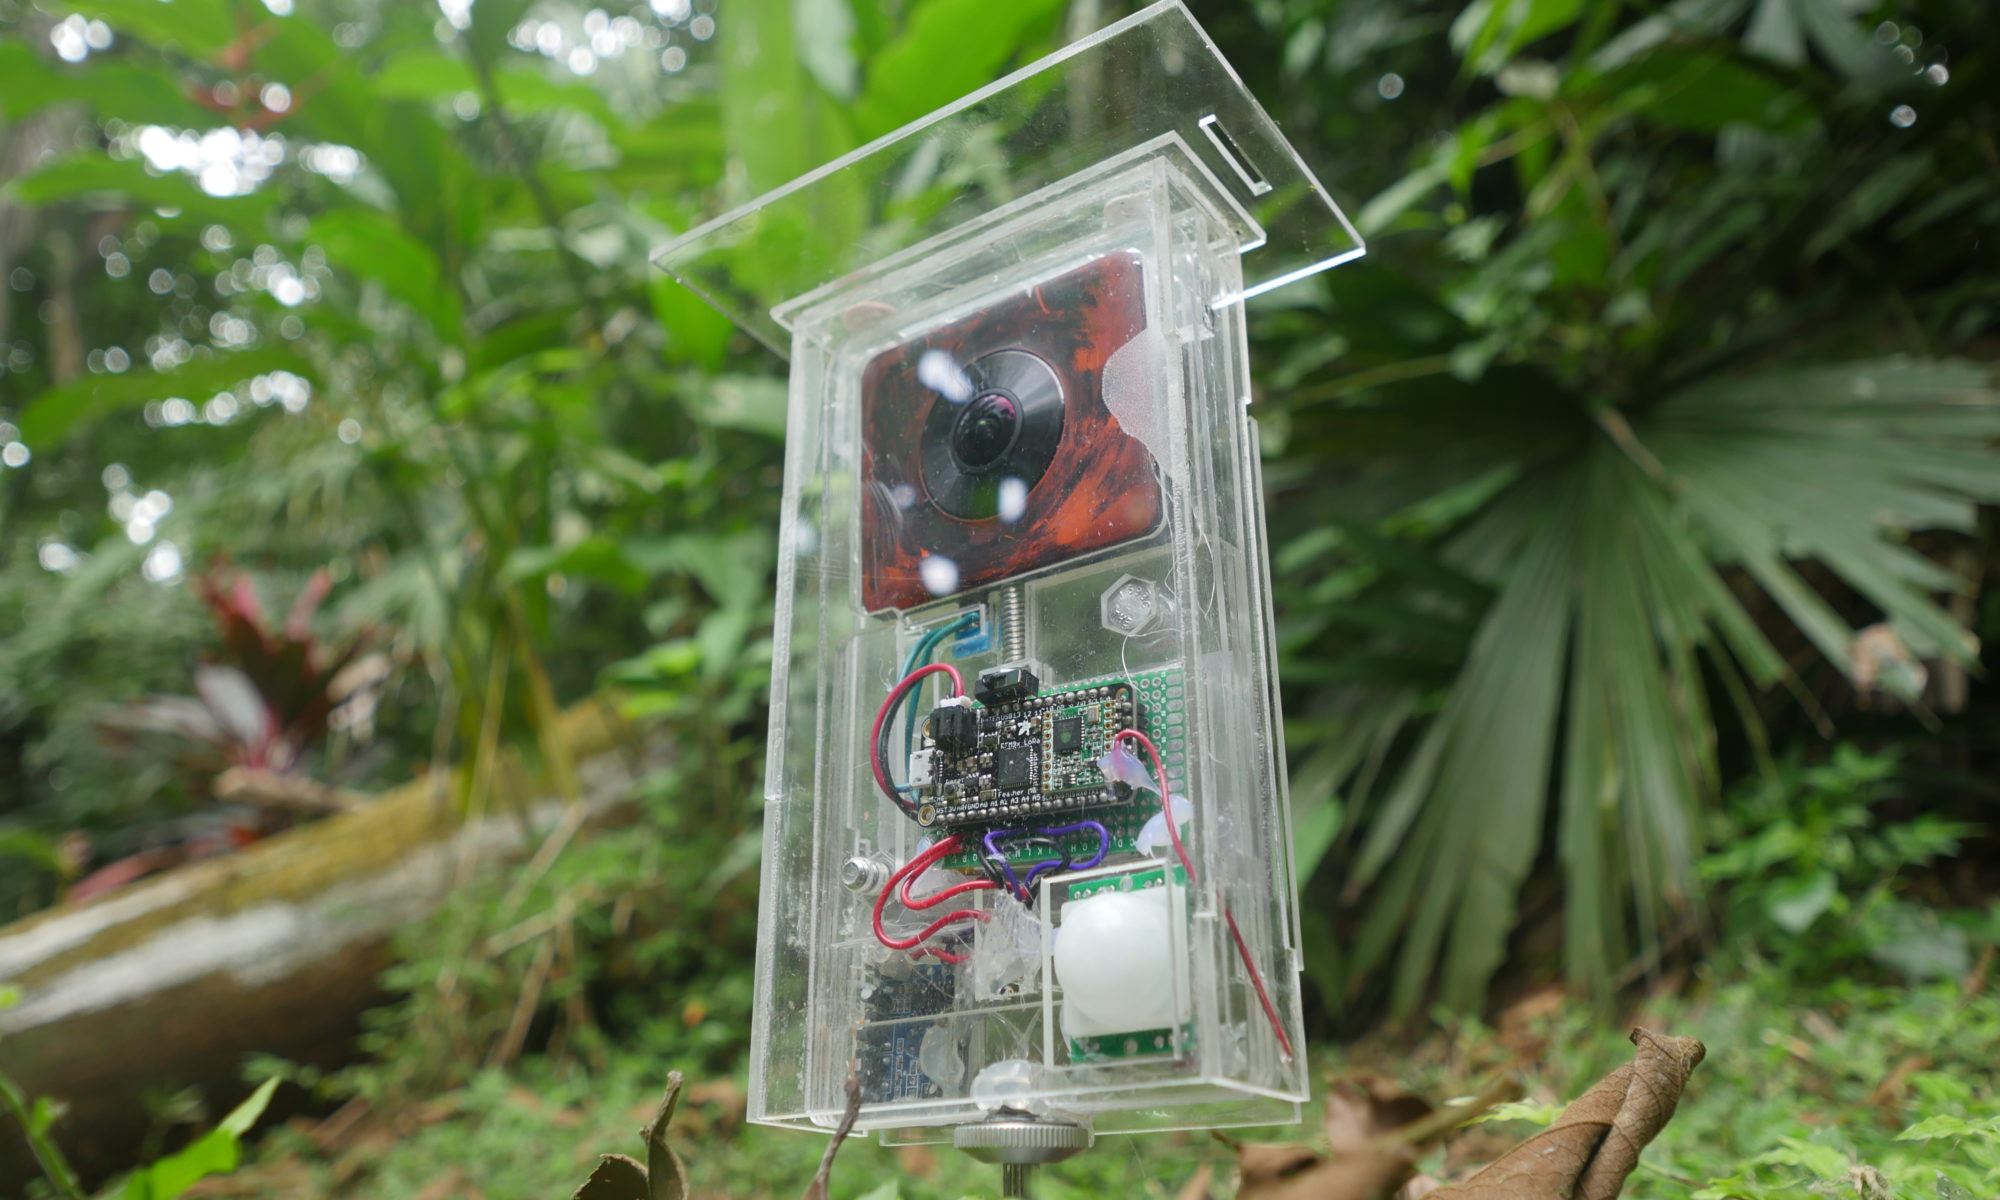
Panatraps are an open-source collection of design files and code for turning commercially available 360 “VR” cameras into panoramic camera traps for studying wildlife in natural environments. These are created in Gamboa, Panama, at Digital Naturalism Laboratories by Andrew Quitmeyer and Danielle Hoogendijk. Work on this project has been supported by:
- The Digital Naturalism Conference (www.dinacon.org)
- Conservation X Labs ( https://conservationx.com/project/key/360cameratraps )
The project files are all open-source and available on these project pages and the project’s github repo: https://github.com/Digital-Naturalism-Laboratories/Panatrap
Table of Contents
Motivation
Camera traps are a super useful tool for field biologists and conservationists! They let us record animals without the presence of humans being in the way! You have probably seen their use on shows like Planet Earth to capture gorgeous footage of super rare leopards and such! They are also invaluable for monitoring less rare species in many different other climates though too! (And also as secret traps to catch poachers!). Cameras traps have lots of limitations though:
- Narrow Field of views cause “placement bias” (e.g. https://www.wildlabs.net/community/thread/231 )
- Commercially available cameras can be pretty pricey (We can make them cheaper!)
- Commercially available ones are generally kinda bulky (and apparently elephants hate them! and try to break them!) – we can make them smaller ourselves!
- The few Commercially available 360 traps that do exist, use old tech for doing only horizontal scanning and are still pricey! (e.g. https://www.amazon.com/Wildgame-Innovations-360Deg… )
As camera trapping expert, Roland Kays, told us about this project, “one 360 camera trap does the work of 10 conventional camera traps!”
The problem is, 360 camera traps aren’t really a thing that exists much yet. There is a ton of work to be done just testing and evaluating them before scientists can really start relying on them for research. So first we need to just start making them ourselves and getting them out in nature!

Design Criteria
Loosely defined, camera traps are simply photographic instruments that can be remotely triggered by wildlife. Typically this is done with a PIR motion sensor triggering a camera to snap a photo. Thus when transforming commercially available cameras to become camera traps, the key abilities we need are:
- Remote Triggering
- The ability to tell the camera to snap a photo or start recording a video
- Low power consumption
- Typically this is the ability to remotely turn the camera ON/OFF, or at least bring the camera in and out of a low power “sleep mode”, and to remotely charge it
- Speedy Capture
- We were told that a typical camera trap aims to go from sensing an animal’s presence to capturing the creature in under 1/2 second
- This ability is often at odds with the “Low power consumption” goal, since many cameras have a not-insignificant amount of wake up time when starting.
- Image quality
- An ideal camera trap will provide a high resolution image of the captured animal
- Outdoor Readiness
- The camera trap needs to be able to withstand being left alone for several days or weeks in its target environment.
- Camera Traps face challenges from the elements (such as rain, heat, wind, and cold)
- They also face challenges from local creatures (such as small insect destruction, or elephant smashing)
- For most mammal surveys, the cameras are recommended to be placed at “knee height” or about 50cm above the ground
Initial Challenges
- How to control the camera
- How to weather proof it
- How to let the sensors work through weather proofing (We learned that Acrylic blocks the PIR’s from working!)
Supplemental challenges
Once these things are up and running, even if they function great, there’s a ton more bonus challenges that will come up such as:
- Processing and Identification workflow for 360 photo and video
- Durability testing
- Transportability testing
- Night vision hacking – either adding a flash or hacking the lenses to make them IR sensitive
Cameras
The collection currently consists of 2 camera trap setups based on the
- Xiaomi Misphere (MADV in the USA)
- Full electronic functional control over
- Turning camera ON/OFF
- Switching camera from Video to Photo Mode
- Trigger a photo or video recording
- Ricoh Theta V
- Full electronic functional control over
- Turning the camera on (waking from sleep mode)
- Triggering a photo or video to begin recording
as we hack more cameras we will add them and their files to this list and repository. We hacked the Ricoh Theta S and posted detailed instructions here: but this was quite a destructive hack (we literally ripped the camera apart and soldered things to its button). The Panatrap project focuses on non-destructive, reversible hacks to turn your 360 camera into a cool trap.
The full list and detailed comparisons of the cameras we are looking at are here:
Xiaomi Misphere
The first camera that we hacked because it has decent image quality, and importantly it has two exposed electrodes on the camera that make hacking very easy!
They made an interface on the bottom of the camera for the camera to be easily controlled with their included “selfie stick.” It’s just two metal electrodes that when connected it sends a message to the camera(the original selfie stick has a 220 ohm resistor connected to a button). From our examinations, the 3 messages you can send to the camera with this interface are:
- Long Press (5 seconds)
- Camera ON/OFF
- Medium Press (2 seconds)
- Toggle Recording Mode (Video to Photo, or Photo to Video)
- Short press (0.5-1 seconds)
- Shutter Button (Take a photo, or start or stop a video)
Code
Code is available in this repo https://github.com/Digital-Naturalism-Laboratories/Panatrap/tree/master/MADV
Hardware
Physical Designs are available here for free download: https://a360.co/2nrPLd8
and included in this repo
Field Tests and Current Battery Life
Current Battery Life: At least 17 hours
Our current setup with the single 3.7V lipo powering the arduino and the MADV running on its own battery has been able to work continuously for at least 17 hours (it ran overnight and triggered upon some things, but it was very dark and we don’t have lights yet)
We ran several field tests around DINALAB in Gamboa Panama, in the Soberania national park nearby, and up in colder cloud forest areas near El Valle, Panama.
How-To Build
This separate post will guide you through how to build your own!
Ricoh Theta V
This camera was substantially more locked up in our attempts to remotely operate it (especially in a way that allows for long term use and have a decently quick trigger).
The advantage of including this camera in our hacks is that it is one of the most popular 360 cameras with lots of infrastructure surrounding it.
The camera runs android, and has an accessible USB Api (to recieve PTP commands) and in theory has all the abilities to remotely A) Turn ON/OFF and B)Trigger a Photo Capture. But the firmware blocks some of these features (even if you switch into developer mode).
Luckily we discovered that sending an emulated Keyboard command (through something like a Teensy Arduino 3.2), can remotely wake up the camera (even though this feature is not documented anywhere!), and then we just need to trigger the photo. The photo triggering is then done by a small servo connected to the arduino which manually taps the shutter button of the camera. The servo is shut down in between photos to reduce power consumption.
Code
Code is available in this repo https://github.com/Digital-Naturalism-Laboratories/Panatrap/tree/master/Theta_V
Hardware
Physical Designs are available here for free download: https://a360.co/2m22suQ and included in this repo
Field Tests and Current Battery Life
Current Battery Life: At least 52 hours
Our Panatrap build for the Theta V includes an additional 3000mAh battery pack which powers the arduino, but also charges the attached Theta V. We haven’t had time yet to actually let the thing drain completely, but it should power the camera for quite some time (of course all these depend on how much activity there is).
Unlike the MADV, the Theta V does not shut down completely, but instead goes into “Sleep Mode.” The advantage is that it can wake up very quickly (Less thank 1/2 a second), and be triggered to snap a photo. The disadvantage is that it uses more power in sleep mode. BUT we did some testing and found the sleep mode to be quite energy efficient! The camera lasted over 4 days in sleep mode!
Theta V Sleep Mode Tests
(Monday) 99% – 4pm
94% – 5 hours later
(Tues)16 hours -88% 8:22 am1:12 pm – 84%6:24pm – 79%12:35AM – 75%
(weds) 8:50AM – 71%12:44pm(weds) – 68%1:57PM – 68%(brief charge to upload plugin code)
7:49 AM (thursday) – 43%
hacking CA camera release https://nfgworld.com/cactus-radio-trigger-for-ricoh-theta-s/
1:12 pm – 20% (after two hours of playing around debugging)
We ran several field tests around DINALAB in Gamboa Panama, in the Soberania national park nearby.
How-To Build
This separate post will guide you through how to build your own!
Background
Initial Prototype
This project started in 2017 creating a quick proof-of-concept for a Scientist at Yale-NUS to see what could be done with relatively new commercially available 360-degree cameras working as camera traps. A full rundown of this first approach and examples from the field in Singapore are available here: https://www.instructables.com/id/360-Camera-Trap/

The first prototype was a destructive hack, meaning that we caused irreparable alterations to the camera (we literally brute forced this thing by cracking open the camera and soldering to its button ports).
Since then, this prototype was further hacked on (and mostly constantly re-fixed), by Danielle Hoogendijk and other participants at the first Digital Naturalism Conference in Thailand, such as Stig Anton Nielson.
Academic Research 2018-2019
Dani continued working with the 360 camera for her Master’s degree in the Netherlands. Her thesis, “Camera Trap Efficacy: a Wider View” compares the effectiveness of a 360 camera trap by comparing its rate of animal detection to traditional camera traps.
The results of this study show that the modified, 360 degree, camera trap was superior in detection, capturing and overall successful functioning (with a mean increment of 89.2% by using the modified camera trap), in relation to all target animal species.
Danielle Hoogedijk, “Camera Trap Efficacy: a Wider View”
Her conclusions were that the 360 camera trap was able to catch far more animals passing by the trap (simply due to its much wider field of view and sensor range). However technical difficulties with this early prototype led to a bunch of wrong triggers too. So we are making much more reliable prototypes for long term testing (She just completed this research project and got her diploma in September 2019!)
Conservation X Labs Grant 2019
Digital Naturalism Laboratories received a grant to refine these prototypes. Dani and Andrew Spent summer 2019 exploring the current state of commercial camera traps and 360 cameras, and talking with experts like Roland Kays. During this time we developed over a dozen prototypes and ended up with two functional designs ready for further deployment. These have been iteratively tested in the jungles and cloud forest of regions around Panama.
Testing and Evaluation
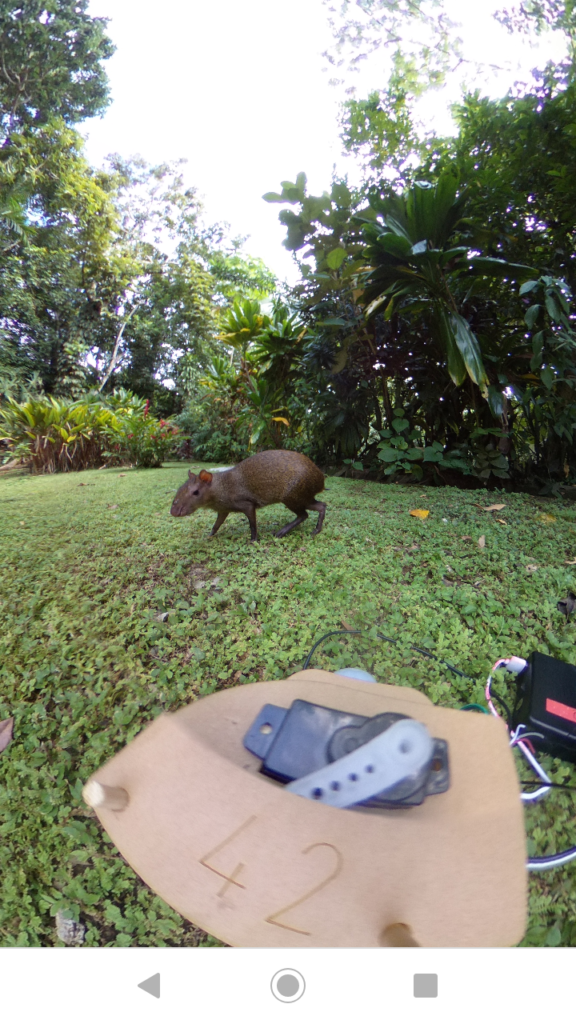
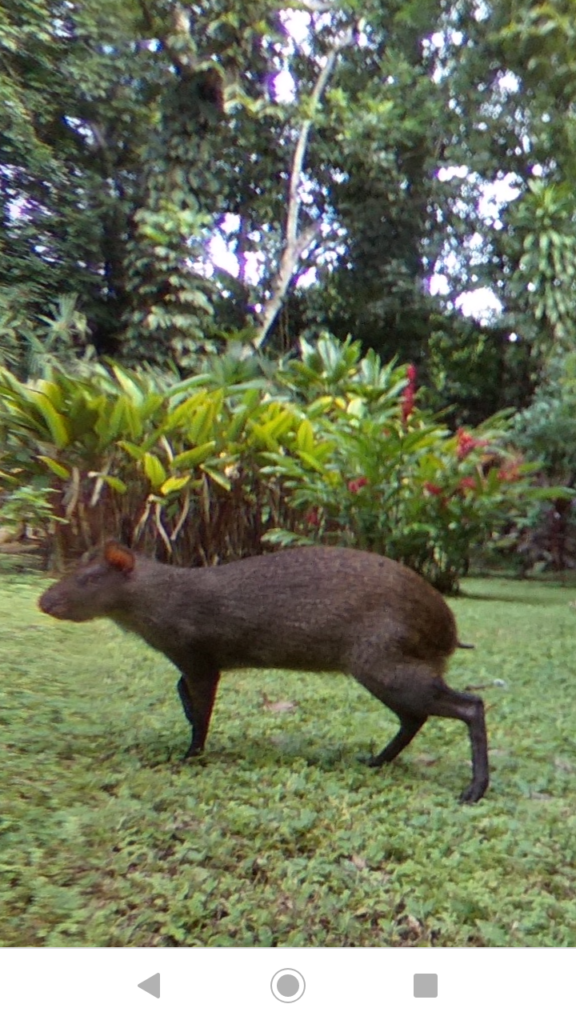
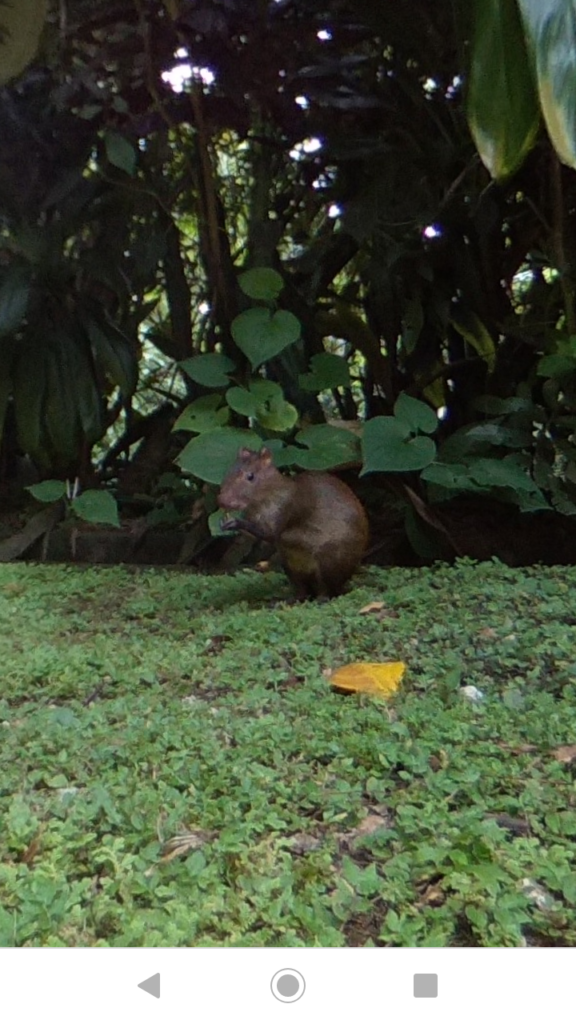
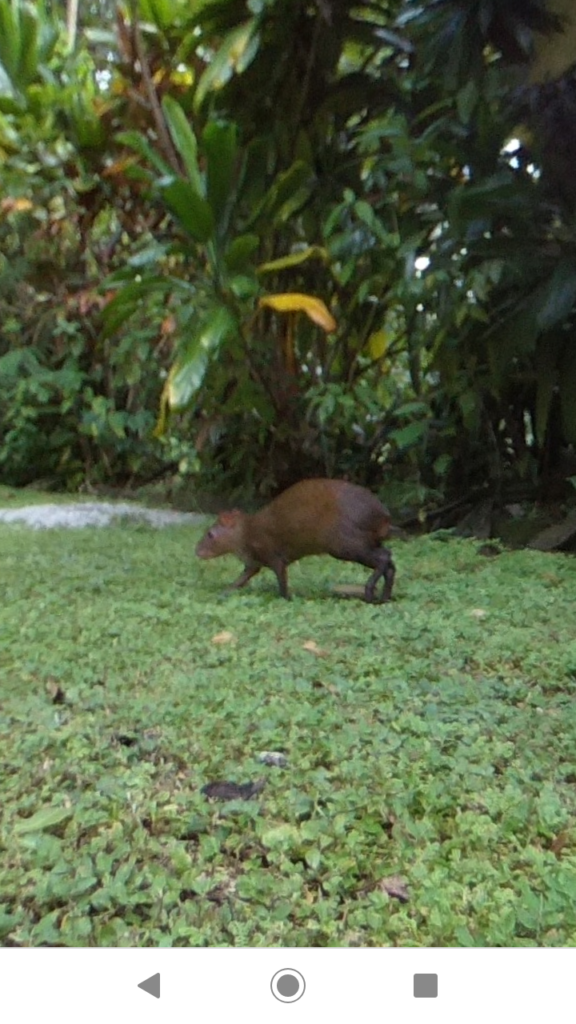
We performed many real world tests with these cameras in Gamboa, Barro Colorado Island, and the cloud forest near El Valle.
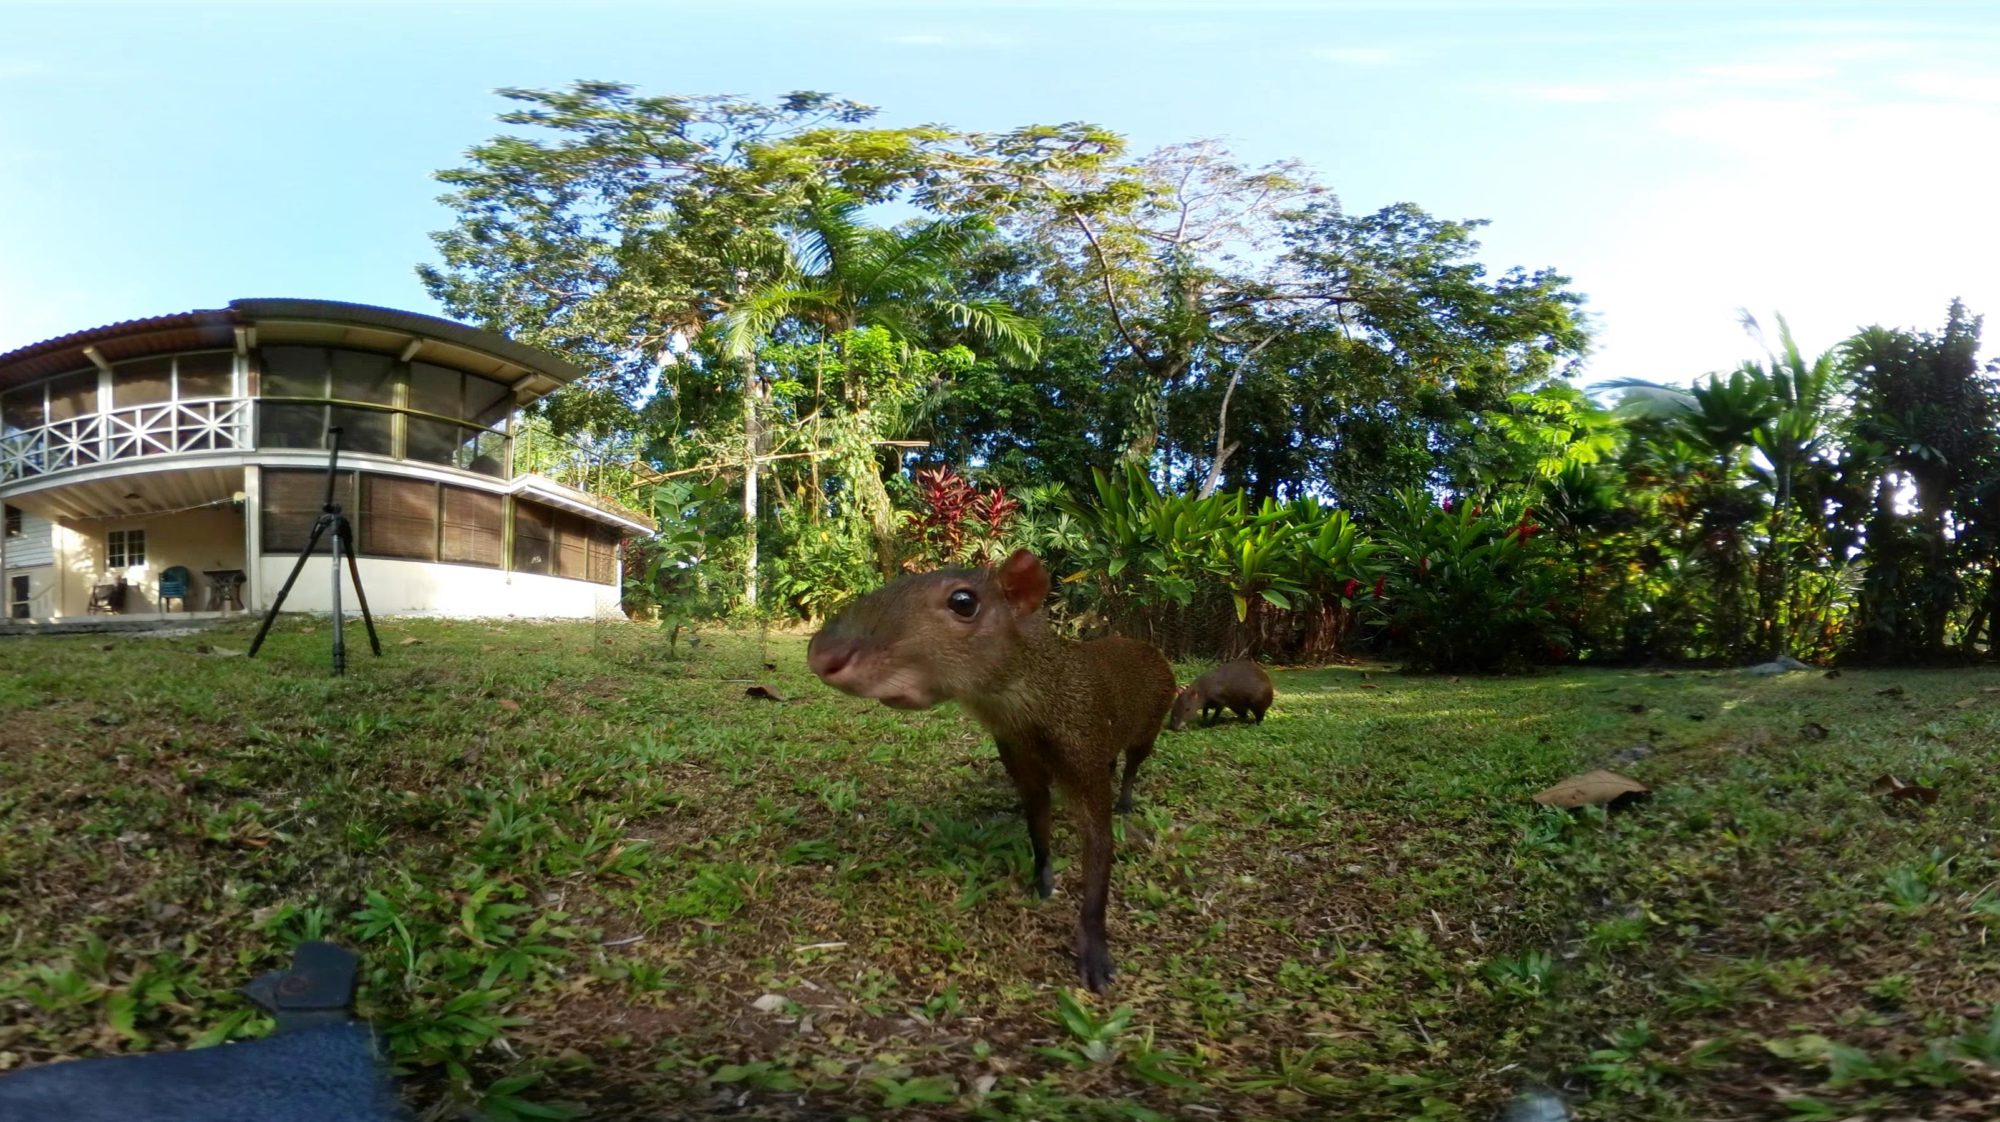
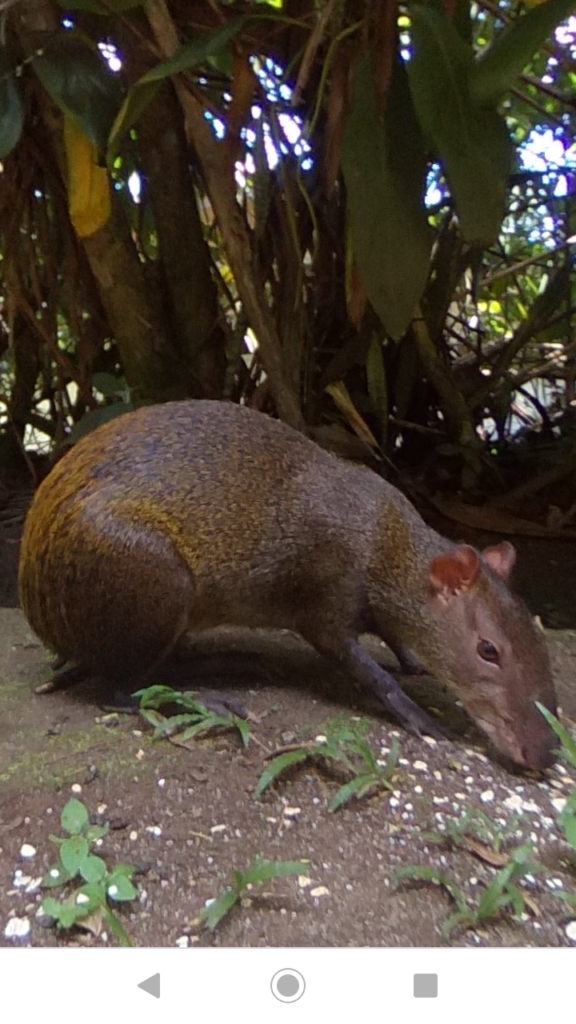
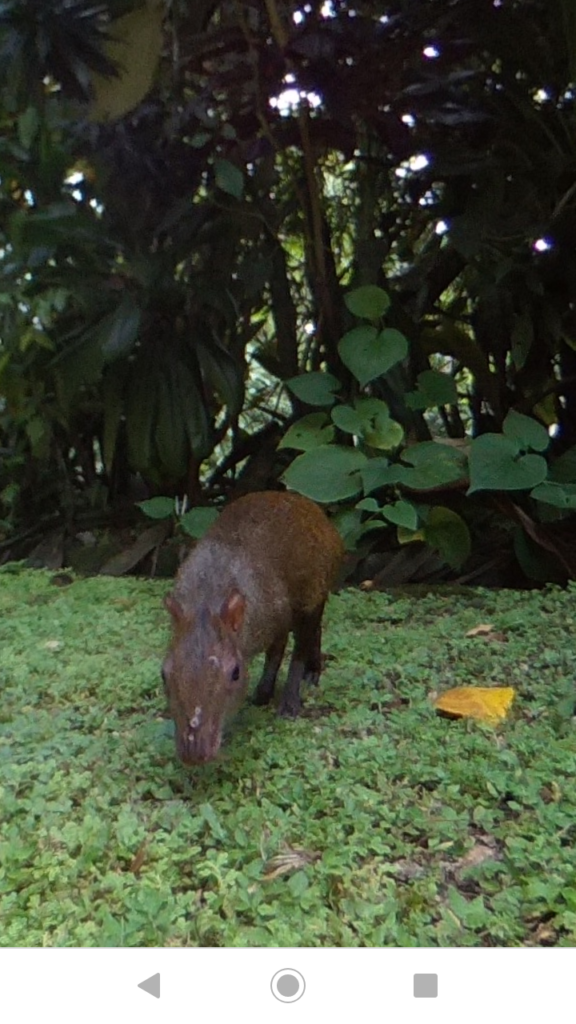
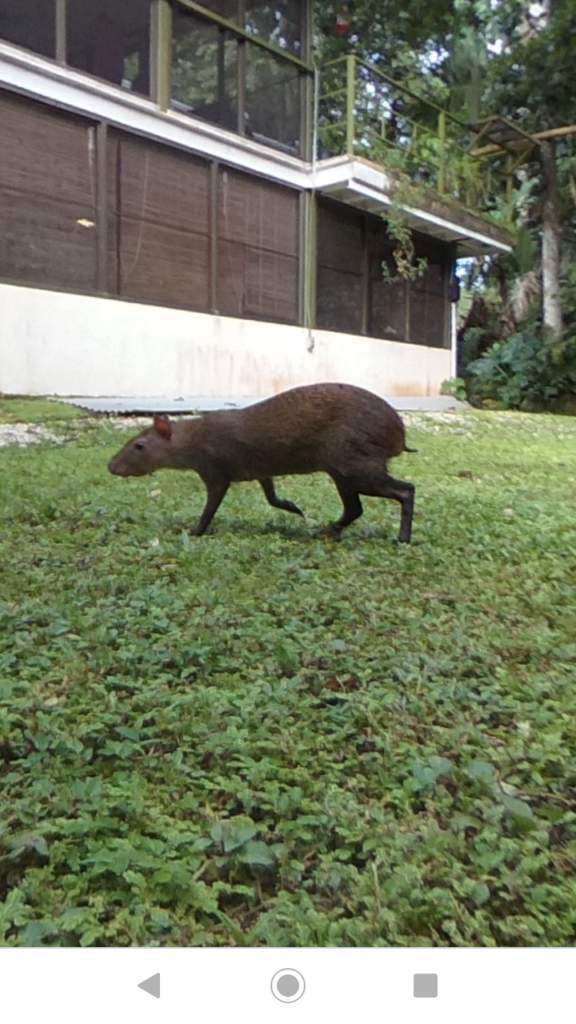
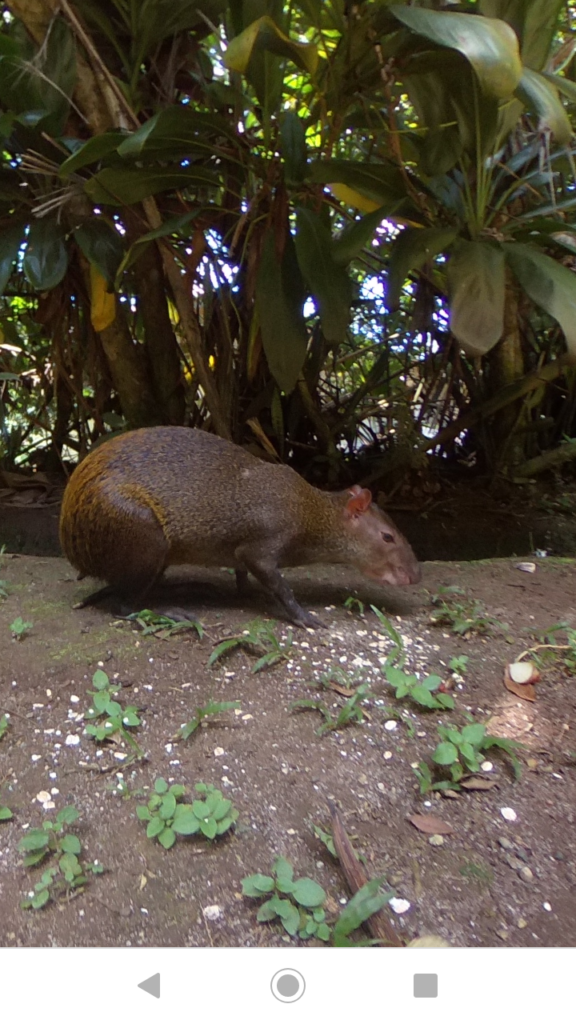
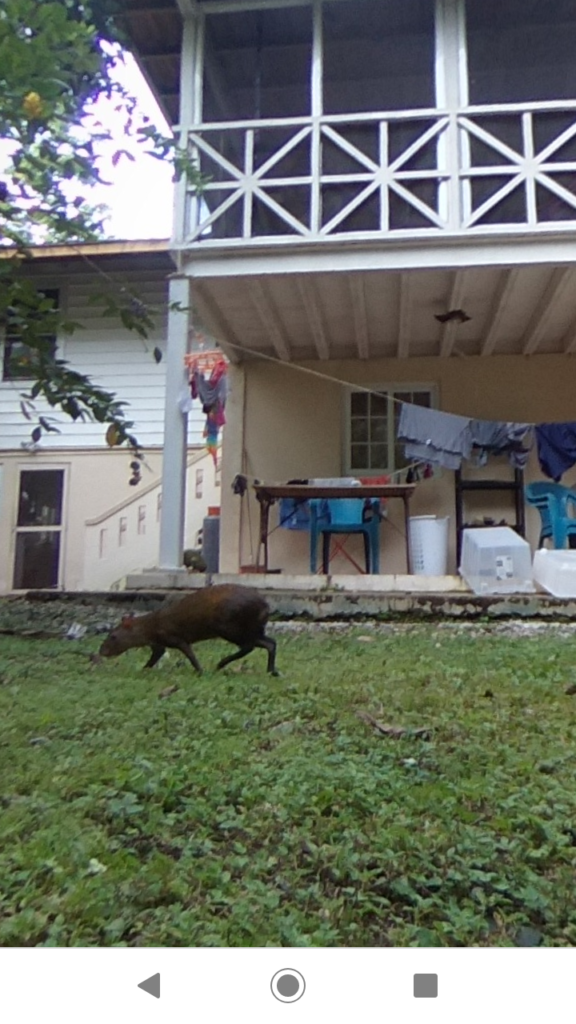
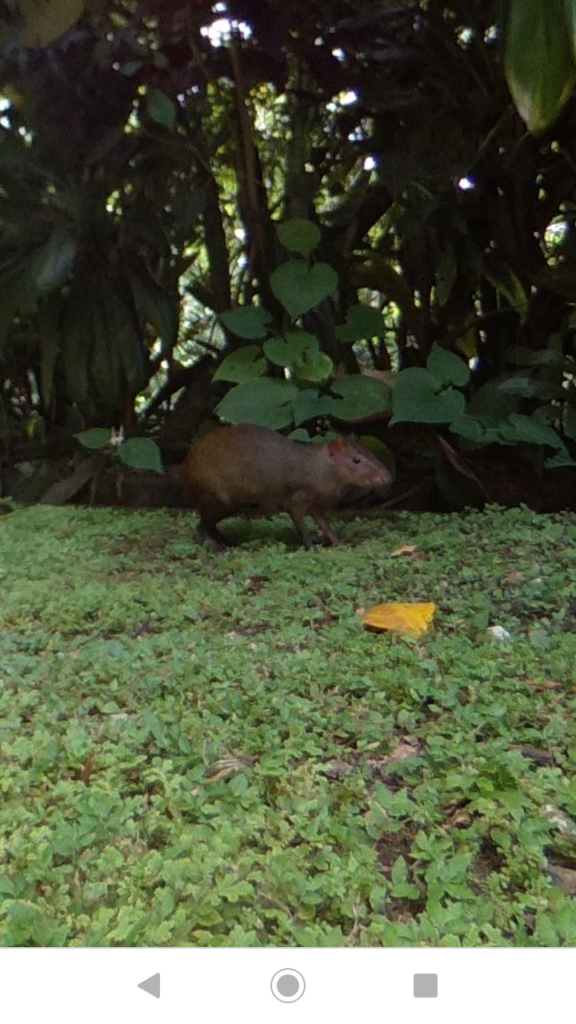
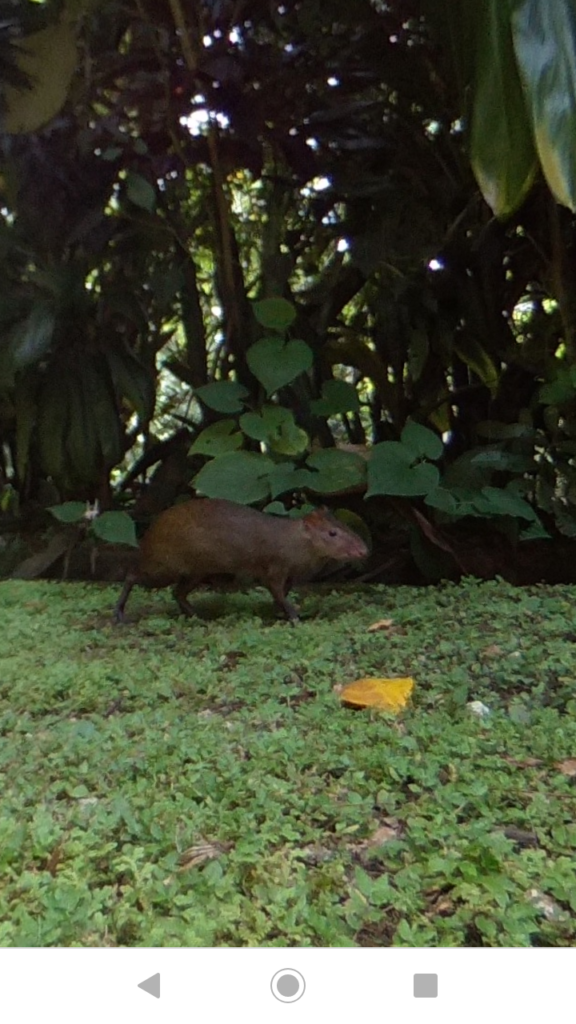
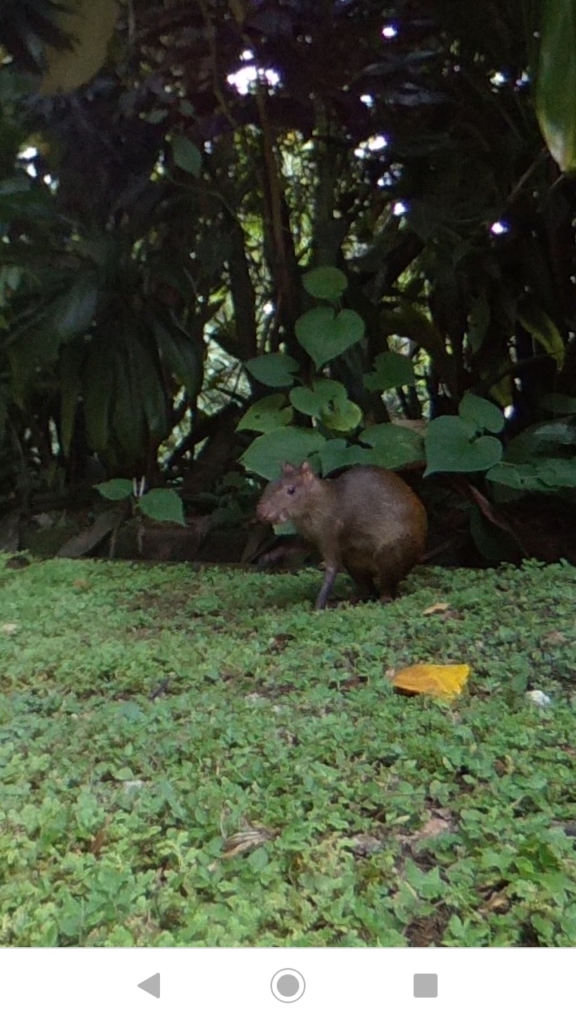
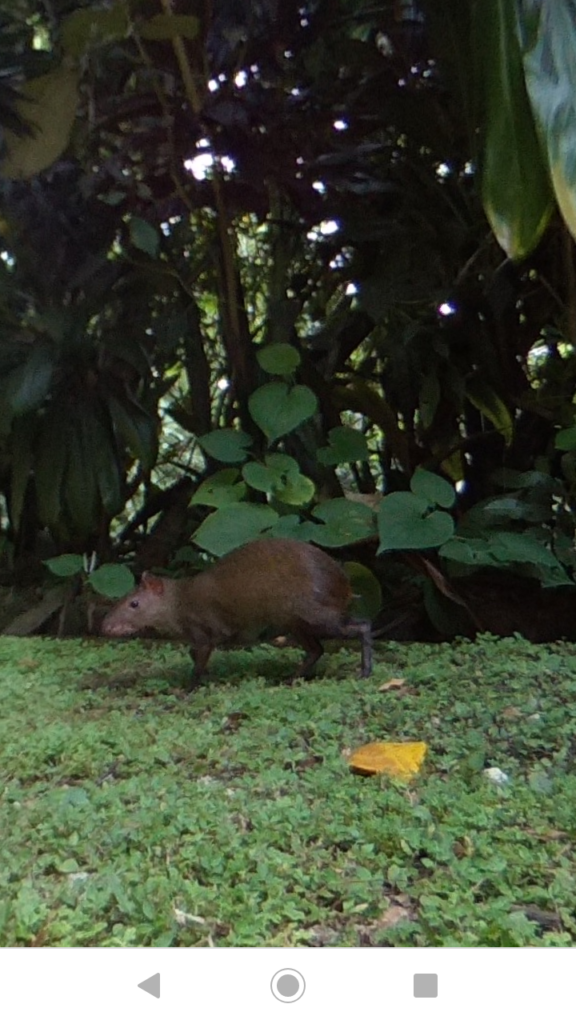
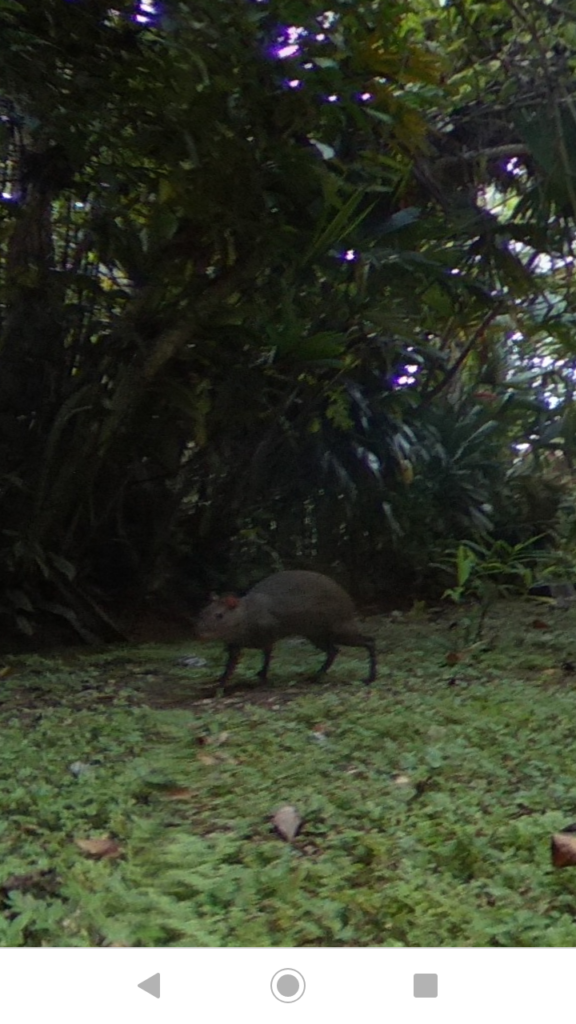
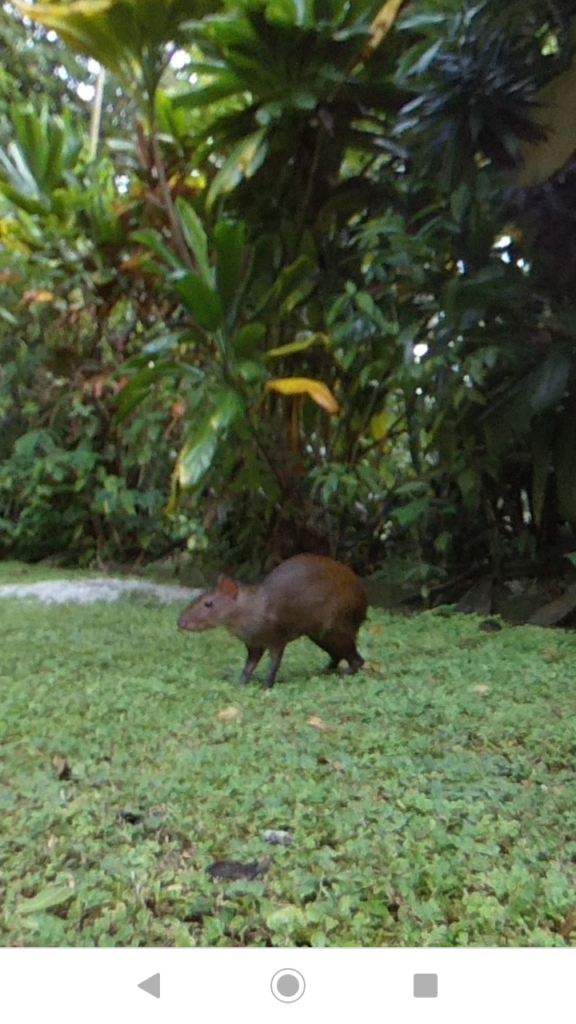
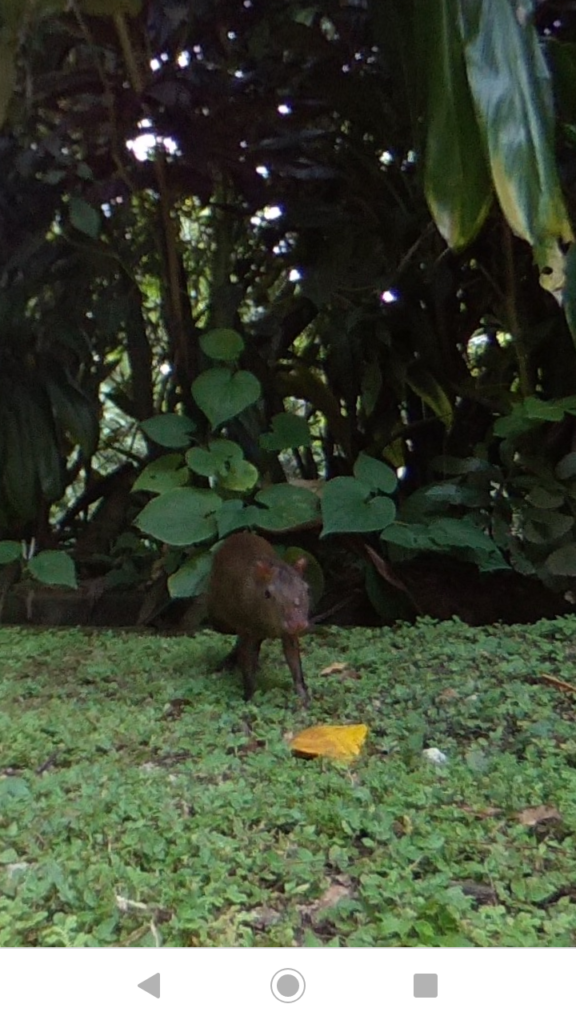
Animals
We had limited time, and so were currently unable to leave the traps out for extended periods of time, and so we have mostly just captured agoutis (an adorable, ubiquitous jungle rodent creature) and some stray dogs. We can’t wait to see what other animals we capture soon!
Next Steps
Just from our first month of testing, we have lots of exciting new tweaks to change and add. In the immediate future, here are the very next steps we are working on:
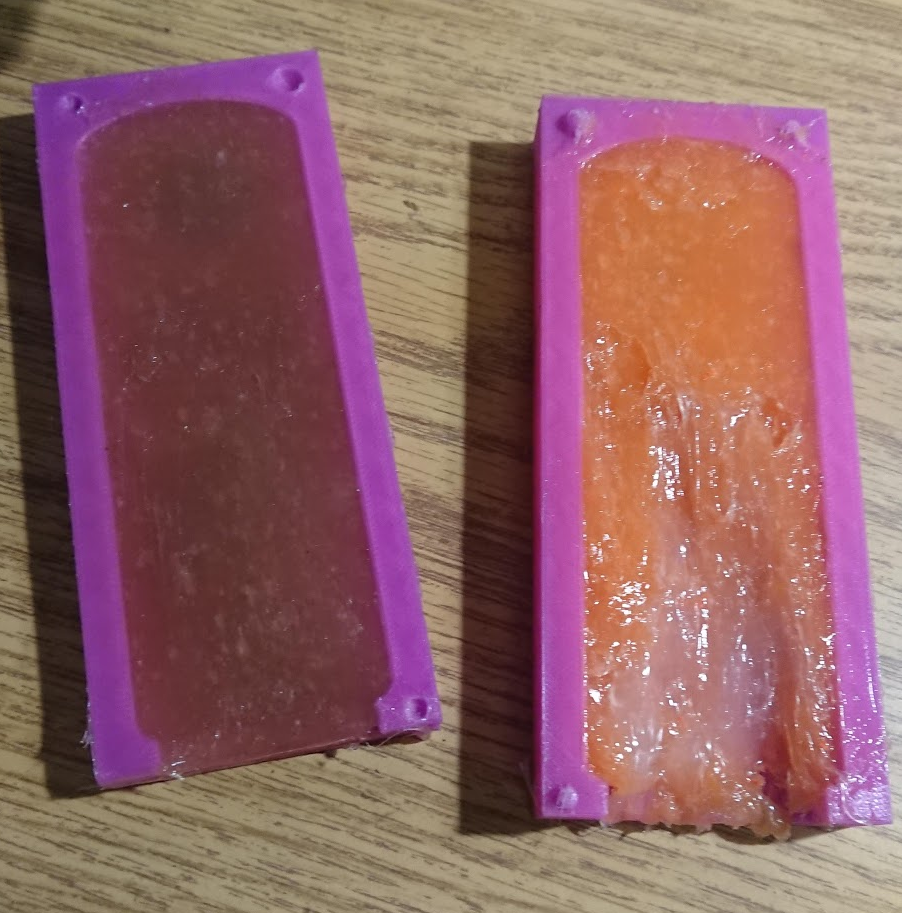
Form Fitting Weather Shield (in progress)
The “big clear box” approach to the weather shields has been working fine, except that it does mask a bit of the footage. Granted we are still getting visual coverage far greater than any traditional camera, there are still seams that block a bit. Perhaps most importantly, since the weather shield is offset a bit from the camera, there leaves room for an internal glare (for instance you can see we used a marker to color the MADV black because it was reflecting off its own internal weather shield).
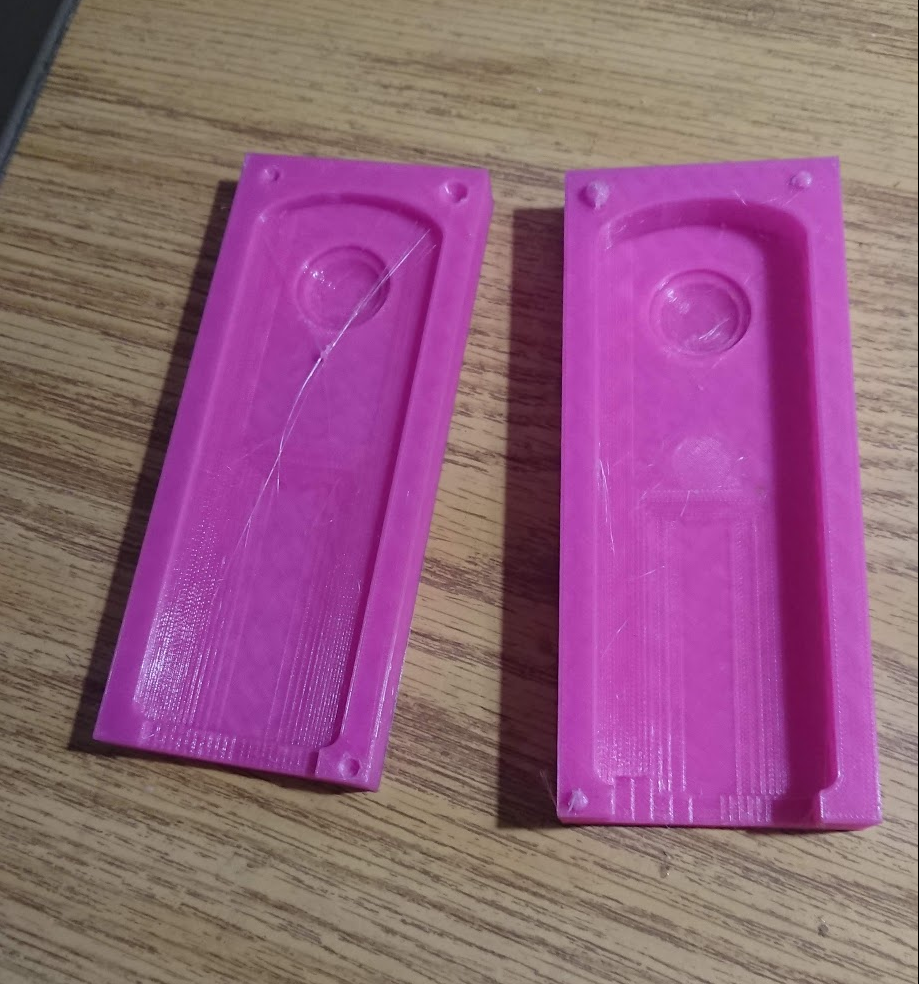
If we do some basic acrylic molding (ideally vacuum forming), we could make a nice, non-distorting, optically clear housing for any camera. We did some test prints of a Theta V, that we molded with cheap Silicone+Acrylic paint, and tried melting some thin clear plastic over it, to some initial success!
Angled Weather Roof
Our current, boxy weather shield is effective, and keeps the horizontal imaging area terrifically clear, but the rain never seems to leave its upper horizontal surface. We need to take some lessons from tropical architecture around here, and make the roof angled at least a little bit to let the drops slide off. This will make sure the area above the 360 camera is also as clear as possible.

More Camera Hacking – Samsung Gear
With its combination of cheap price tag, but high quality imagery, the Samsung gear is next on our list of cameras to be hacked. Most likely it will involve the Servo hack currently used with the Theta V, as its interface and documentation is quite poor.
Yarncraft and Cognition – Creativity and Cognition 2017 by Andrew Quitmeyer
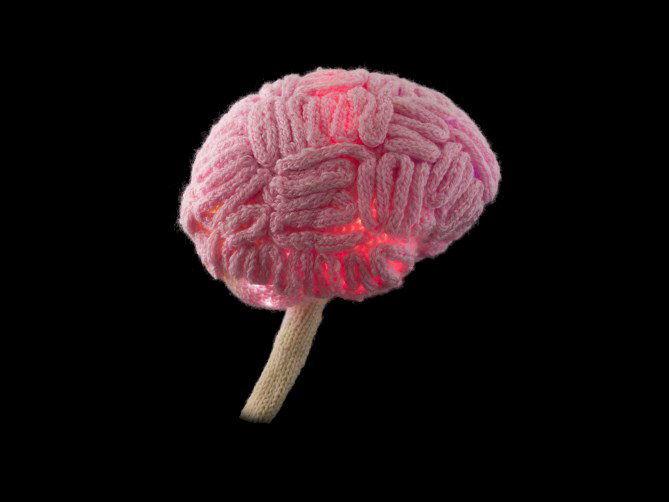
Paper by Kitty Kelly about using yarn to explore the mind both biologically and mentally.
Abstract
The popularity of knitting and crochet, or yarncraft, is on the ascent. As more people discover its pleasures, enthusiasts and neuroscientists are also realizing that crafting with yarn elicits soothing and therapeutic effects. The meditative aspects of knitting and crochet are already familiar to the legions of yarncrafters, but recognition of the neuroscience of yarncraft is a relatively recent phenomenon. This work proposes to embody the relationship between yarncraft and its neurological benefits with a physical art project. This project will take the form of a large crocheted e-textile brain sculpture with embedded LEDs whose illumination is controlled live by a brain-computer interface worn by a yarncrafting practitioner. This sculpture visualizes the changes in the neurology of the yarncrafter.
Yarncraft and Cognition – Creativity and Cognition 2017 by Andrew Quitmeyer on Scribd
Digital Naturalist Design Guidelines: Theory, Investigation, Development, and Evaluation of a Computational Media Framework to Support Ethological Exploration
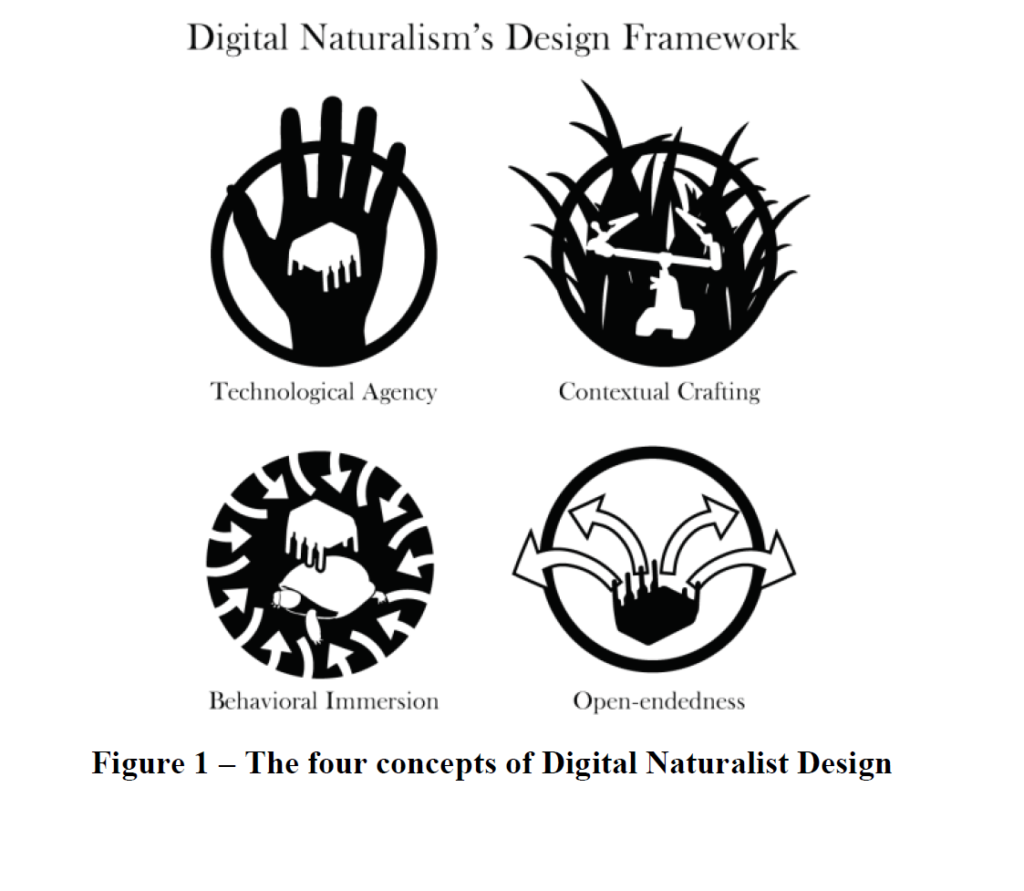
This paper outlines Andrew Quitmeyer’s PhD work developing a design framework for interacting with wild creatures and biological field work.
Digital Naturalist Design Guidelines: Theory, Investigation, Development, and Evaluation of a Computational… by Andrew Quitmeyer on Scribd
Abstract
This research aims to develop and evaluate a design
framework for creating digital devices that support the
exploration of animal behaviors in the wild. This paper
quickly shares the main concepts and theories from the
fields forming Digital Naturalism’s foundation while
presenting the key challenges emerging from these critical
intersections between field biology and computational
media. It then reviews the development of this research’s
hybrid methodology designed specifically for its multi-year
series of “Qualitative Action Research” fieldwork carried
out at a rainforest field station.
This paper analyzes the resulting on-site ethnographies,
workshops, design projects, and interactive performances,
whose take-aways are synthesized into design guidelines
for digital-natural media. This framework, itself, is then
evaluated via an extra iteration of fieldwork and the results
discussed. Finally, the paper identifies targets for continued
research development. Further areas of interest are
presented which will promote Digital Naturalism’s
progression into its own topic of study.